> ## Documentation Index
> Fetch the complete documentation index at: https://docs.tessact.ai/llms.txt
> Use this file to discover all available pages before exploring further.
# Admin Bulk Actions
> Use selection-based actions in the Tessact user directory for role assignment, membership changes, activation, and exports.
## Overview
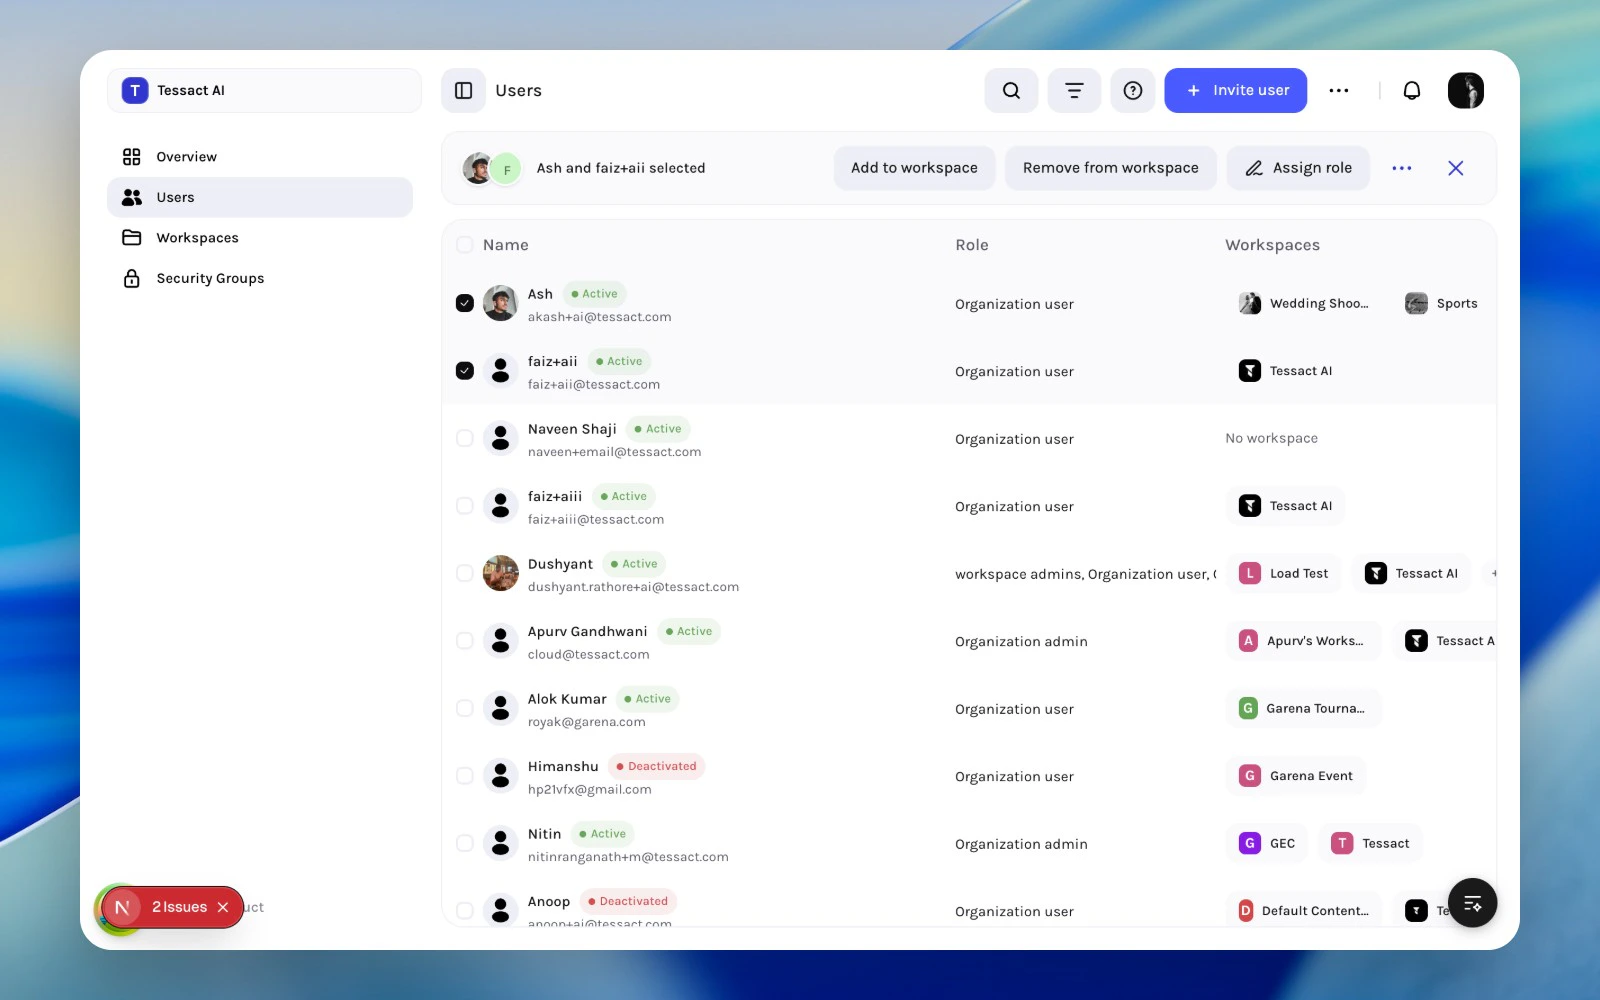
The **Users** directory is designed for batch admin work, not only one-off user edits. Once you select one or more users, Tessact exposes bulk actions for the most common org admin jobs.
This is the fastest path for repeated operations such as onboarding, cleanup, and access correction.
 ***
## Available Bulk Actions
Depending on permissions, bulk actions include:
| Action | What it does |
| ------------------------- | --------------------------------------------------------------- |
| **Add to workspace** | Adds selected users to a workspace with a chosen workspace role |
| **Remove from workspace** | Removes selected users from a chosen workspace |
| **Assign role** | Changes the organization role for the selected users |
| **Activate users** | Restores access for deactivated accounts |
| **Deactivate users** | Disables access for selected accounts |
| **Download users** | Exports the selected users |
Some actions only appear when your organization permissions allow them.
***
## Typical Bulk Workflows
### Onboard A Team
1. Invite or bulk add users.
2. Select the new users.
3. Use **Add to workspace**.
4. Apply the correct workspace role.
### Clean Up Dormant Access
1. Filter for inactive users.
2. Select the affected accounts.
3. Remove workspace access or deactivate the accounts, depending on the case.
### Standardize Org Roles
1. Filter by current role or search for a cohort.
2. Select the users.
3. Use **Assign role**.
This is safer than updating roles ad hoc over time because it keeps role changes intentional and visible.
Search or filter the directory until the cohort is unambiguous, then select the matching users from the table.
Click **Assign role** from the selected-user action bar. Tessact applies one organization role across the entire selected cohort.
***
## Available Bulk Actions
Depending on permissions, bulk actions include:
| Action | What it does |
| ------------------------- | --------------------------------------------------------------- |
| **Add to workspace** | Adds selected users to a workspace with a chosen workspace role |
| **Remove from workspace** | Removes selected users from a chosen workspace |
| **Assign role** | Changes the organization role for the selected users |
| **Activate users** | Restores access for deactivated accounts |
| **Deactivate users** | Disables access for selected accounts |
| **Download users** | Exports the selected users |
Some actions only appear when your organization permissions allow them.
***
## Typical Bulk Workflows
### Onboard A Team
1. Invite or bulk add users.
2. Select the new users.
3. Use **Add to workspace**.
4. Apply the correct workspace role.
### Clean Up Dormant Access
1. Filter for inactive users.
2. Select the affected accounts.
3. Remove workspace access or deactivate the accounts, depending on the case.
### Standardize Org Roles
1. Filter by current role or search for a cohort.
2. Select the users.
3. Use **Assign role**.
This is safer than updating roles ad hoc over time because it keeps role changes intentional and visible.
Search or filter the directory until the cohort is unambiguous, then select the matching users from the table.
Click **Assign role** from the selected-user action bar. Tessact applies one organization role across the entire selected cohort.
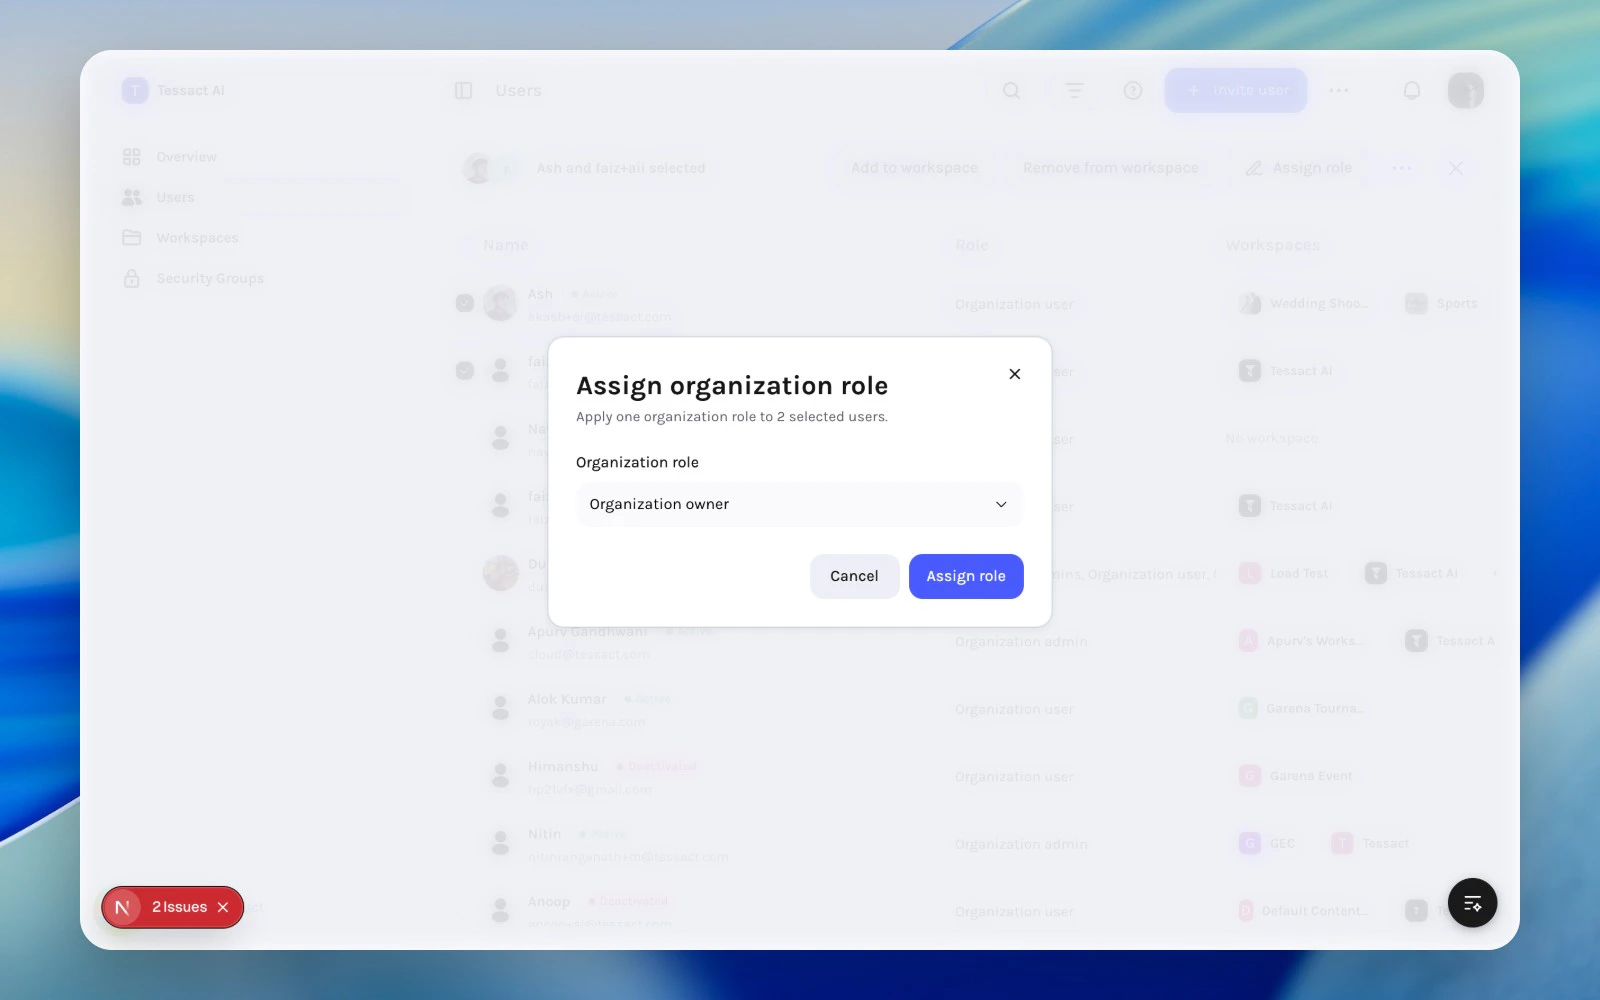 Double-check that the selected users share the same intended admin responsibility. Organization role changes have broader impact than workspace membership changes, so they should stay deliberate and reviewable.
***
## Use Selection Carefully
Bulk actions are powerful because they compress admin time, but they also increase blast radius.
Before applying a bulk change:
* confirm the filters are still correct
* check how many users are selected
* verify whether the action changes **org role**, **workspace membership**, or **account status**
Bulk actions are best for repeatable, well-understood changes. If a case is ambiguous, open the user first and inspect the details sheet before changing it.
***
## Exporting Users
The users directory supports CSV-style export actions from both the page action menu and the selected-user bulk menu.
Exports are useful for:
* external audits
* license planning
* spreadsheet-based access reviews
* reconciling user lists against HR or IT systems
When you only need a review subset, exporting the selected users is cleaner than exporting the entire organization.
***
## Practical Bulk-Action Order
When several changes are needed at once, keep the order clean:
1. Filter and select the exact cohort.
2. Use **Add to workspace** or **Remove from workspace** for access changes.
3. Use **Assign role** only if the person's organization-level responsibility changed.
4. Use activation or deactivation after the access model is correct.
5. Export the selected cohort if you want an audit snapshot before a large cleanup.
***
## Best Practices
* Use bulk actions for cohorts, not edge cases.
* Filter first, select second, apply third.
* Keep role changes and membership changes conceptually separate.
* Prefer removal from a workspace over full deactivation when the person still belongs in the organization.
* Export before large cleanup passes if you want a simple audit trail.
***
## Next Steps
See the end-to-end flow for invites, activation, and review.
Focus specifically on workspace access changes from the user directory.
Double-check that the selected users share the same intended admin responsibility. Organization role changes have broader impact than workspace membership changes, so they should stay deliberate and reviewable.
***
## Use Selection Carefully
Bulk actions are powerful because they compress admin time, but they also increase blast radius.
Before applying a bulk change:
* confirm the filters are still correct
* check how many users are selected
* verify whether the action changes **org role**, **workspace membership**, or **account status**
Bulk actions are best for repeatable, well-understood changes. If a case is ambiguous, open the user first and inspect the details sheet before changing it.
***
## Exporting Users
The users directory supports CSV-style export actions from both the page action menu and the selected-user bulk menu.
Exports are useful for:
* external audits
* license planning
* spreadsheet-based access reviews
* reconciling user lists against HR or IT systems
When you only need a review subset, exporting the selected users is cleaner than exporting the entire organization.
***
## Practical Bulk-Action Order
When several changes are needed at once, keep the order clean:
1. Filter and select the exact cohort.
2. Use **Add to workspace** or **Remove from workspace** for access changes.
3. Use **Assign role** only if the person's organization-level responsibility changed.
4. Use activation or deactivation after the access model is correct.
5. Export the selected cohort if you want an audit snapshot before a large cleanup.
***
## Best Practices
* Use bulk actions for cohorts, not edge cases.
* Filter first, select second, apply third.
* Keep role changes and membership changes conceptually separate.
* Prefer removal from a workspace over full deactivation when the person still belongs in the organization.
* Export before large cleanup passes if you want a simple audit trail.
***
## Next Steps
See the end-to-end flow for invites, activation, and review.
Focus specifically on workspace access changes from the user directory.