> ## Documentation Index
> Fetch the complete documentation index at: https://docs-dev.tessact.ai/llms.txt
> Use this file to discover all available pages before exploring further.
# Livestream
> Stream directly into Tessact over RTMP to capture, review, and use AI features on live content in real time.
## Overview
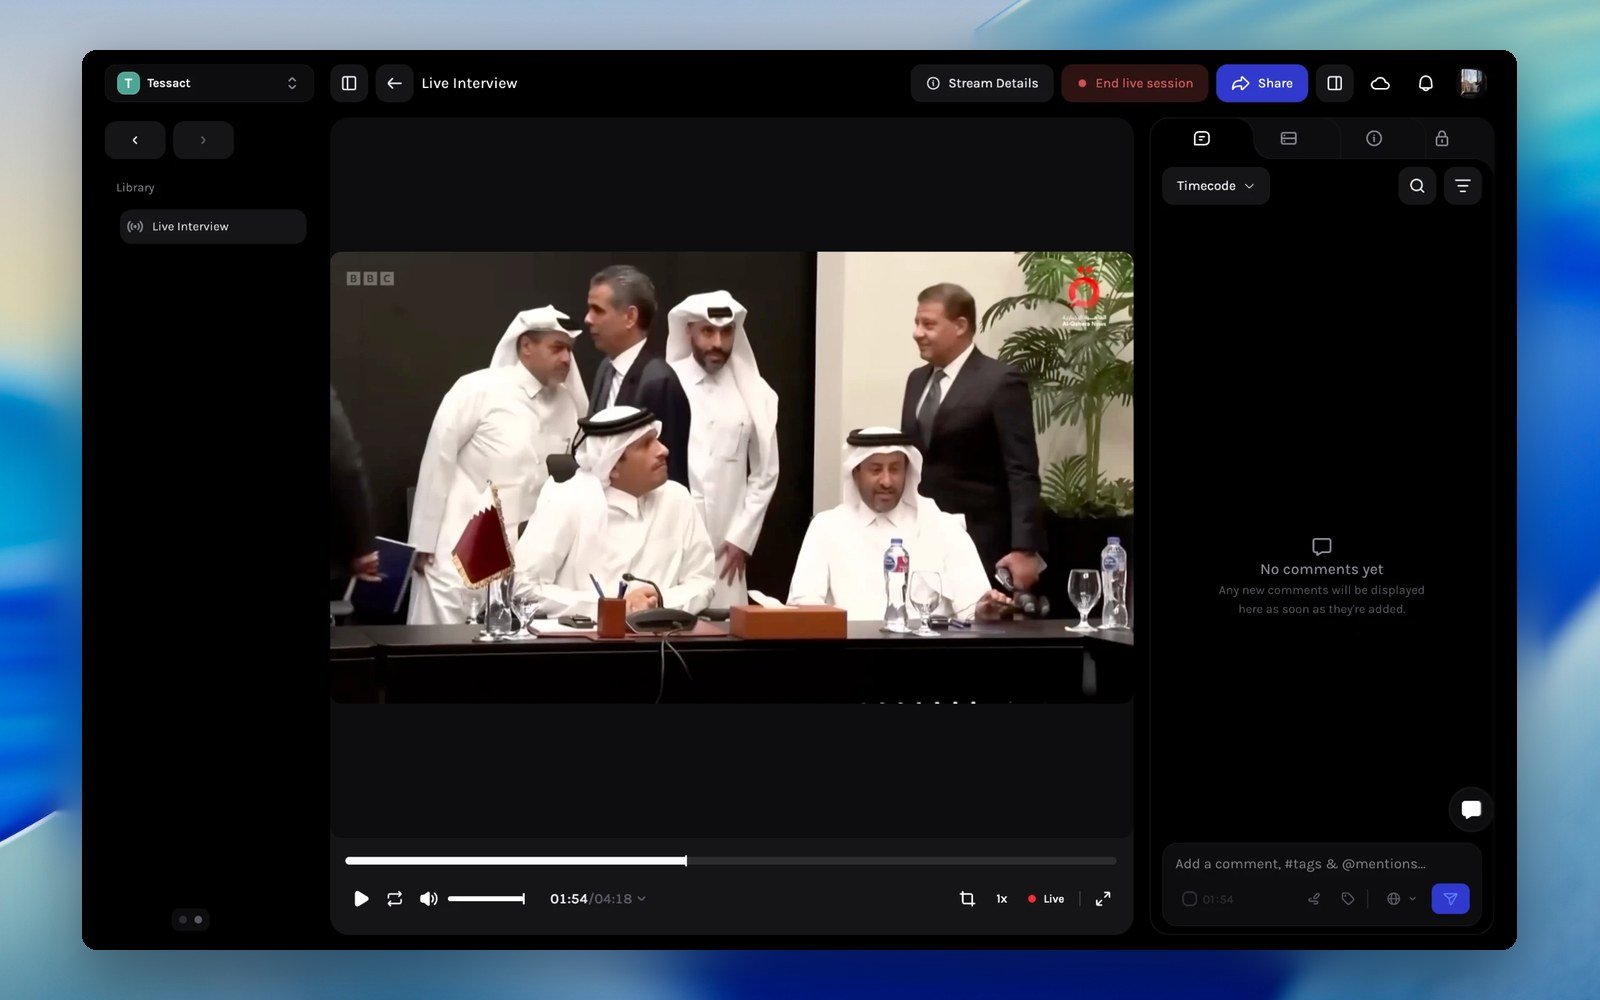
A livestream in Tessact is a Library asset that receives a live video signal. Point any RTMP encoder (OBS, Streamlabs, vMix, a hardware encoder, or ffmpeg) at the stream's ingest URL, and Tessact captures the session in recorded chunks while it is still running. You can watch the live feed, drop timecoded comments, cut clips in the Editor, and let AI indexing make the content searchable before the stream even ends.
 * **Stream from anywhere:** Tessact provisions dedicated RTMP ingest details per stream; any RTMP-compatible tool can push to them.
* **Recorded in chunks:** the session is captured as segments of a duration you choose, so recorded media appears while the stream is live.
* **A growing asset:** the livestream behaves like any other Library asset. Comment on it, share it, open it in the Editor, and search it.
* **AI-ready in real time:** each finished chunk is analysed, so transcripts, detections, and AI Search results build up during the session.
***
## Create a livestream
In the **Library**, select the chevron next to the new-folder button, or right-click empty space, and choose **New livestream**.
* **Stream from anywhere:** Tessact provisions dedicated RTMP ingest details per stream; any RTMP-compatible tool can push to them.
* **Recorded in chunks:** the session is captured as segments of a duration you choose, so recorded media appears while the stream is live.
* **A growing asset:** the livestream behaves like any other Library asset. Comment on it, share it, open it in the Editor, and search it.
* **AI-ready in real time:** each finished chunk is analysed, so transcripts, detections, and AI Search results build up during the session.
***
## Create a livestream
In the **Library**, select the chevron next to the new-folder button, or right-click empty space, and choose **New livestream**.
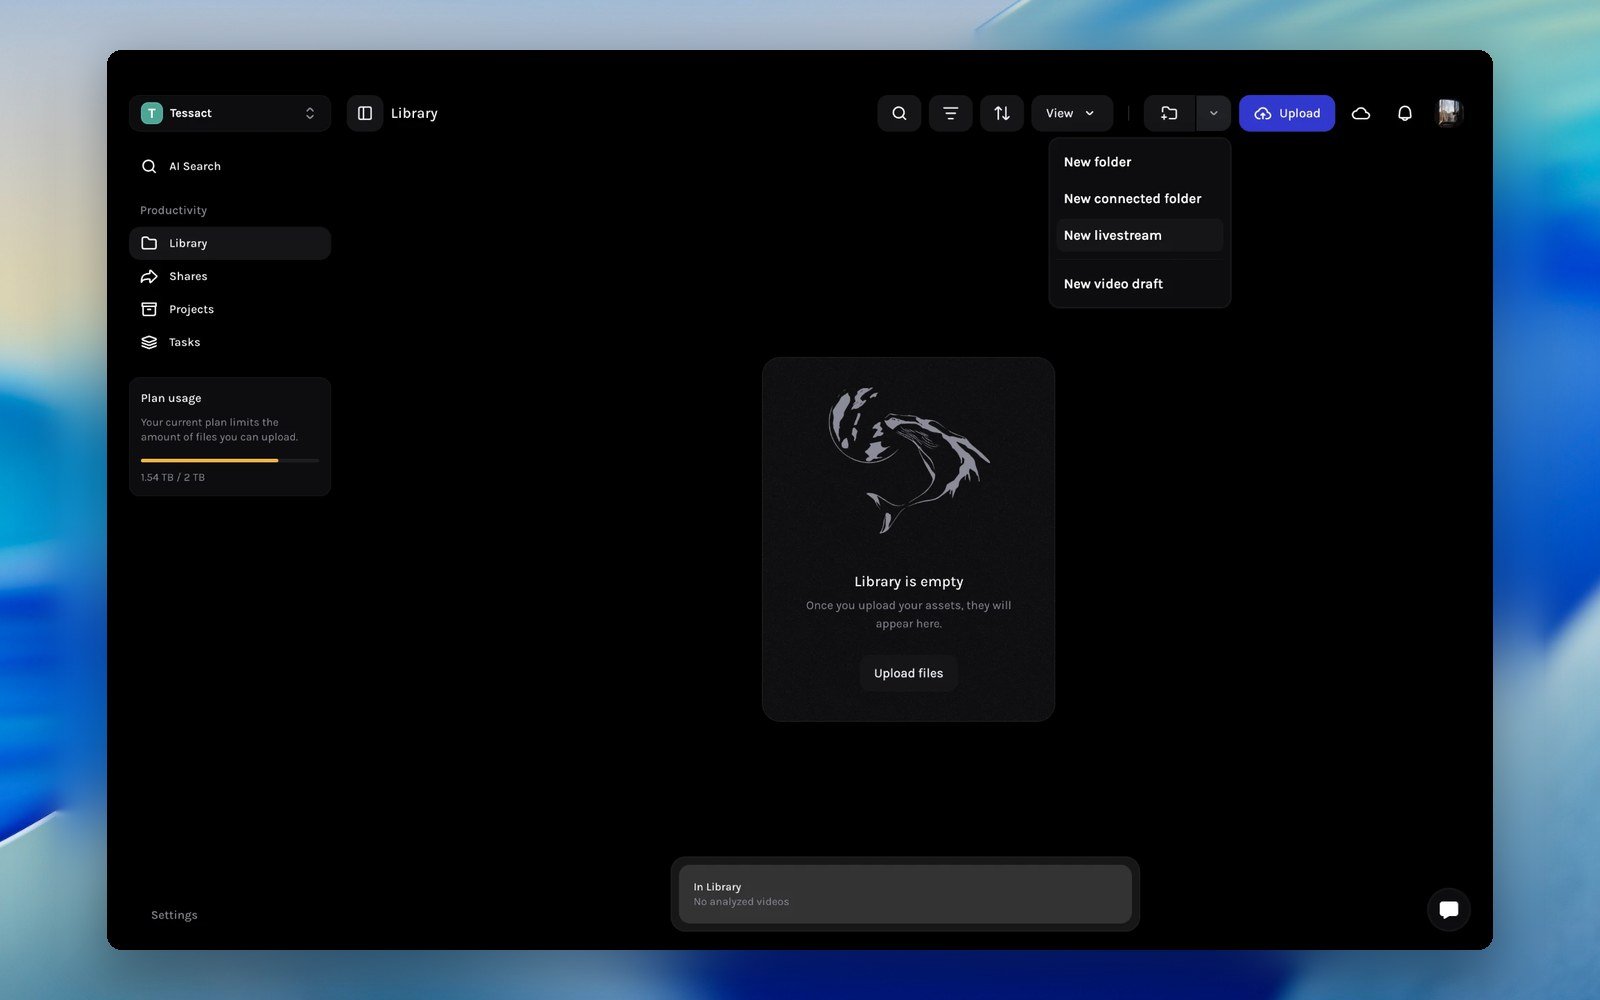 In the **Add Live Stream** dialog, enter a **Livestream name** and choose a **Chunk Size** of 1, 5, 10, 15, 30, or 60 minutes. Shorter chunks make recorded media and AI results appear sooner; longer chunks give the AI more continuous context per segment. **RTMP Pull** is the livestream method. Select **Configure Livestream**.
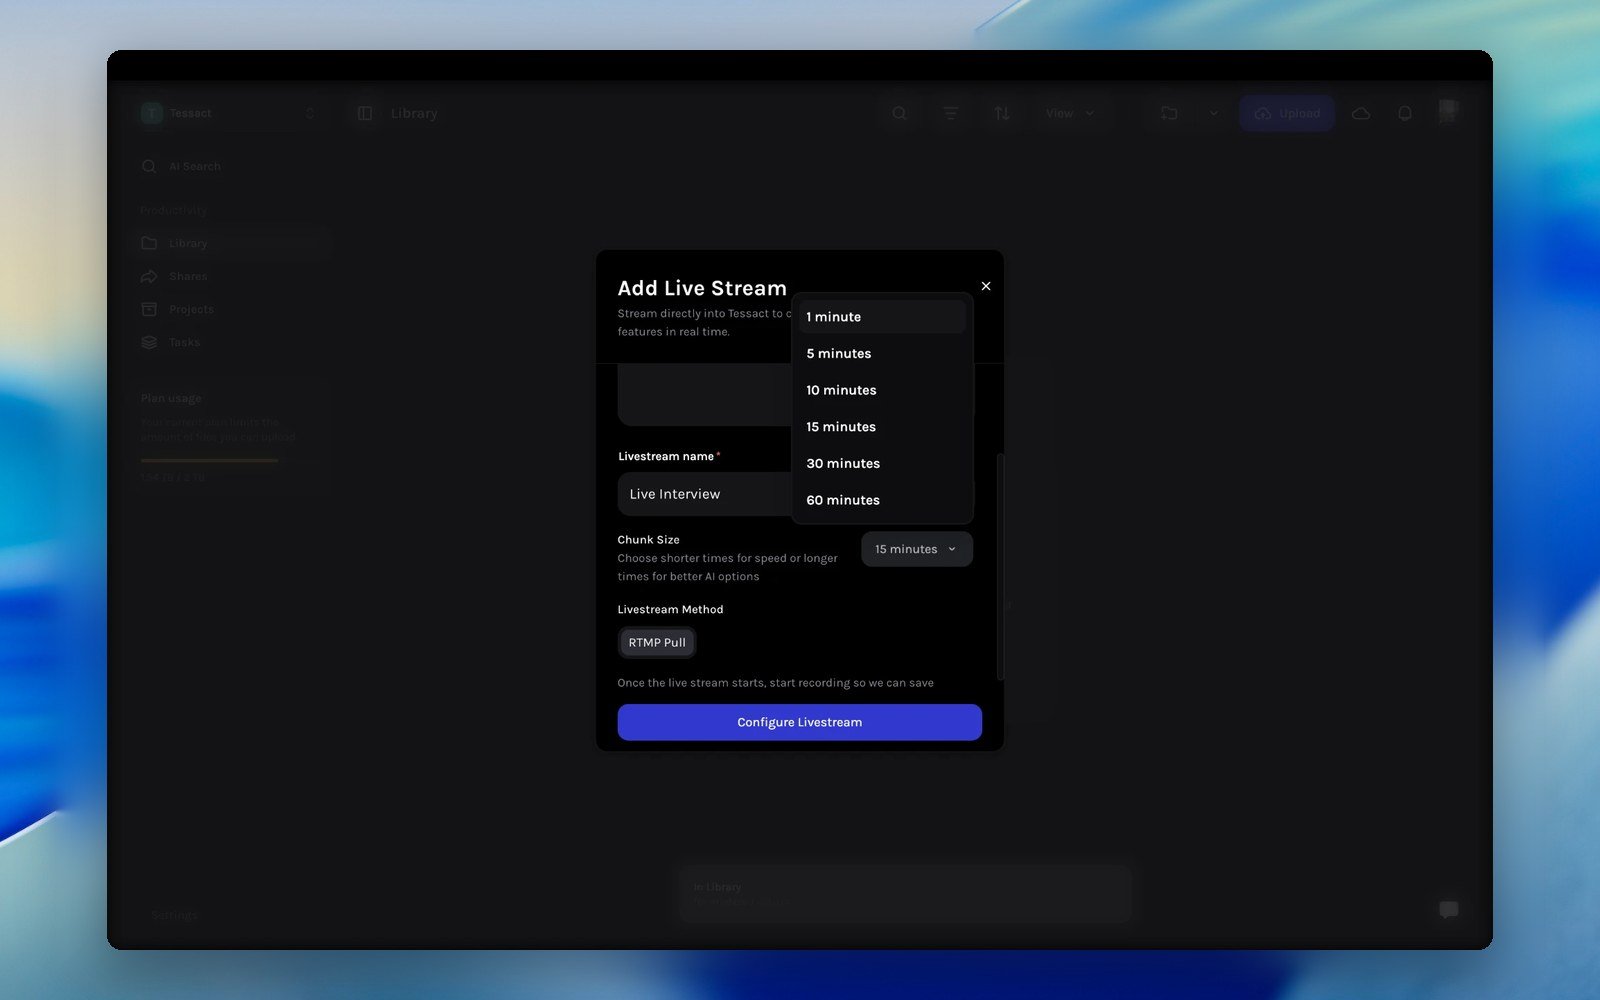 Tessact provisions a dedicated stream receiver. The dialog shows **Preparing Stream** for a short while, then reveals your streaming details.
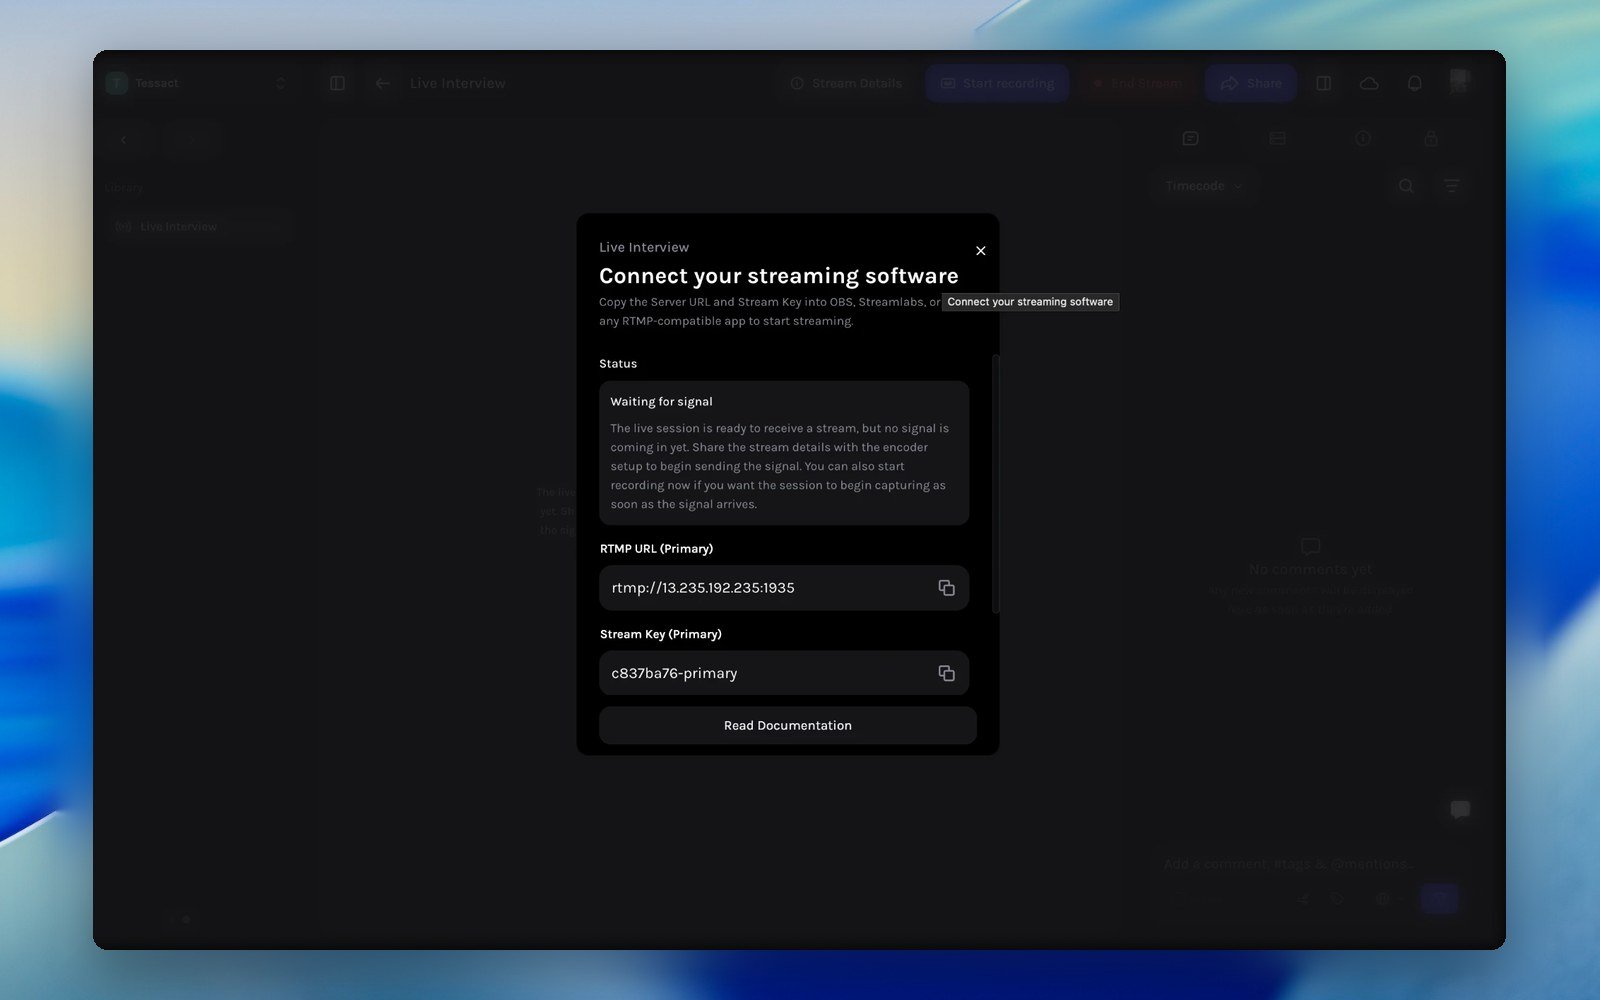
Copy the **RTMP URL (Primary)** and **Stream Key (Primary)** into your streaming software. You can close the dialog with **Done** at any point.
Tessact provisions a dedicated stream receiver. The dialog shows **Preparing Stream** for a short while, then reveals your streaming details.
Copy the **RTMP URL (Primary)** and **Stream Key (Primary)** into your streaming software. You can close the dialog with **Done** at any point.
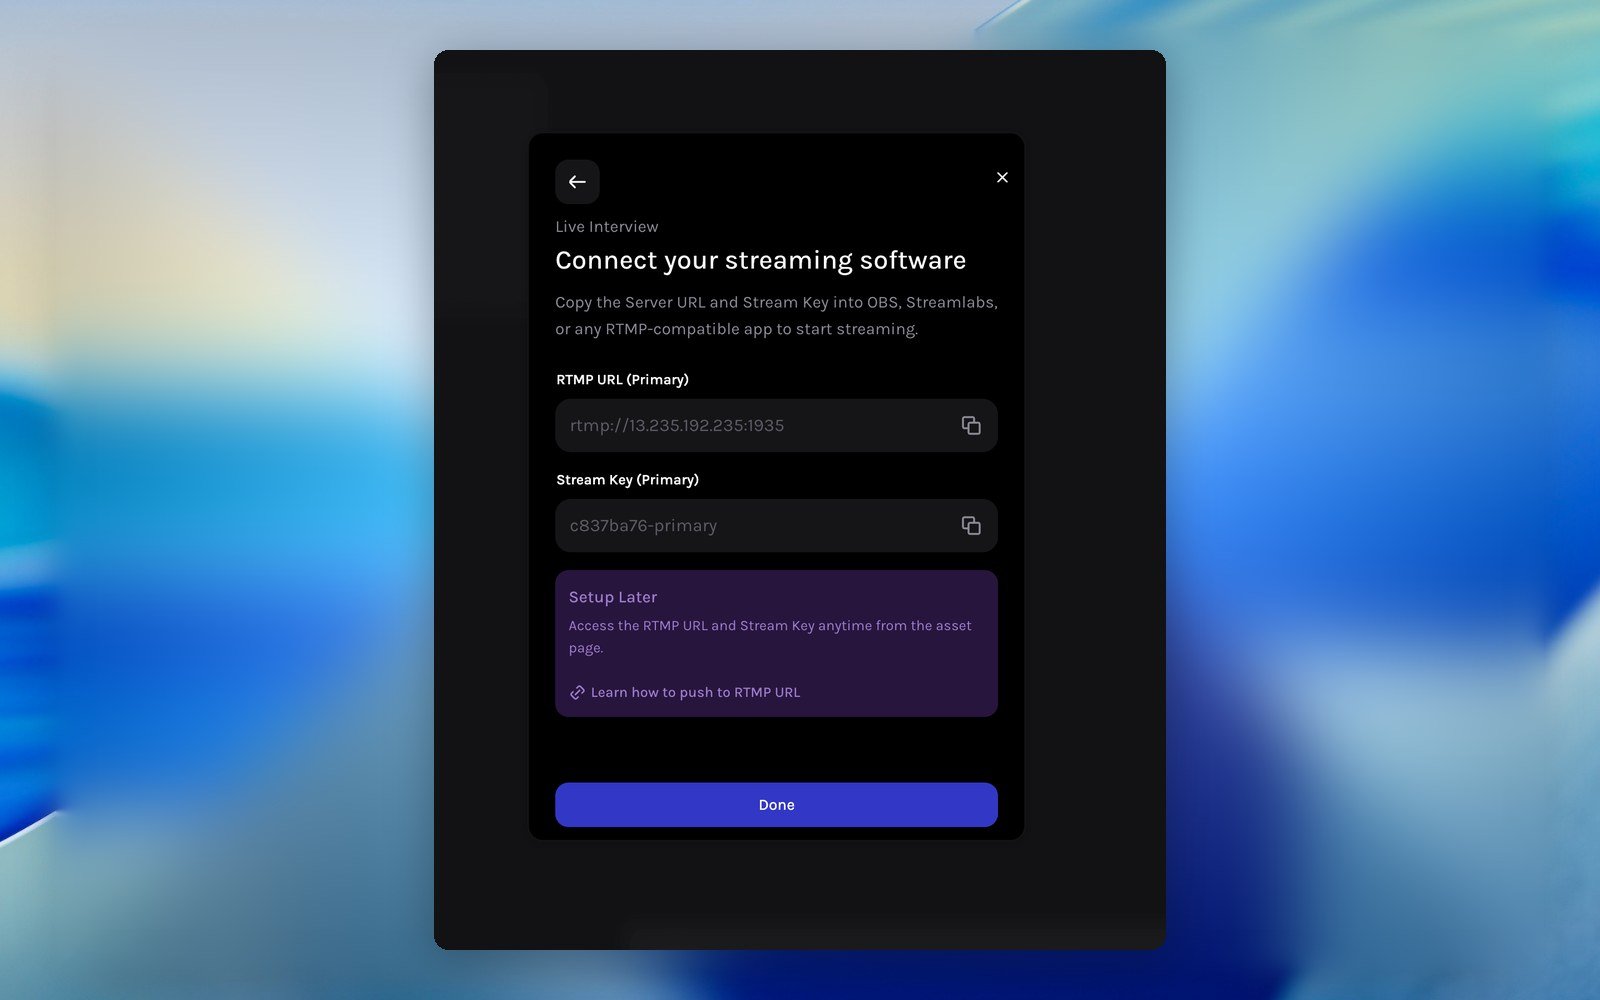 The livestream now appears as a Library card with the status **Stream Created**.
You do not have to set up the encoder immediately. The RTMP URL and Stream Key stay available on the asset page: open the card's menu and choose **View details**, or select **Stream Details** on the asset page.
The livestream now appears as a Library card with the status **Stream Created**.
You do not have to set up the encoder immediately. The RTMP URL and Stream Key stay available on the asset page: open the card's menu and choose **View details**, or select **Stream Details** on the asset page.
 ***
## Connect your streaming software
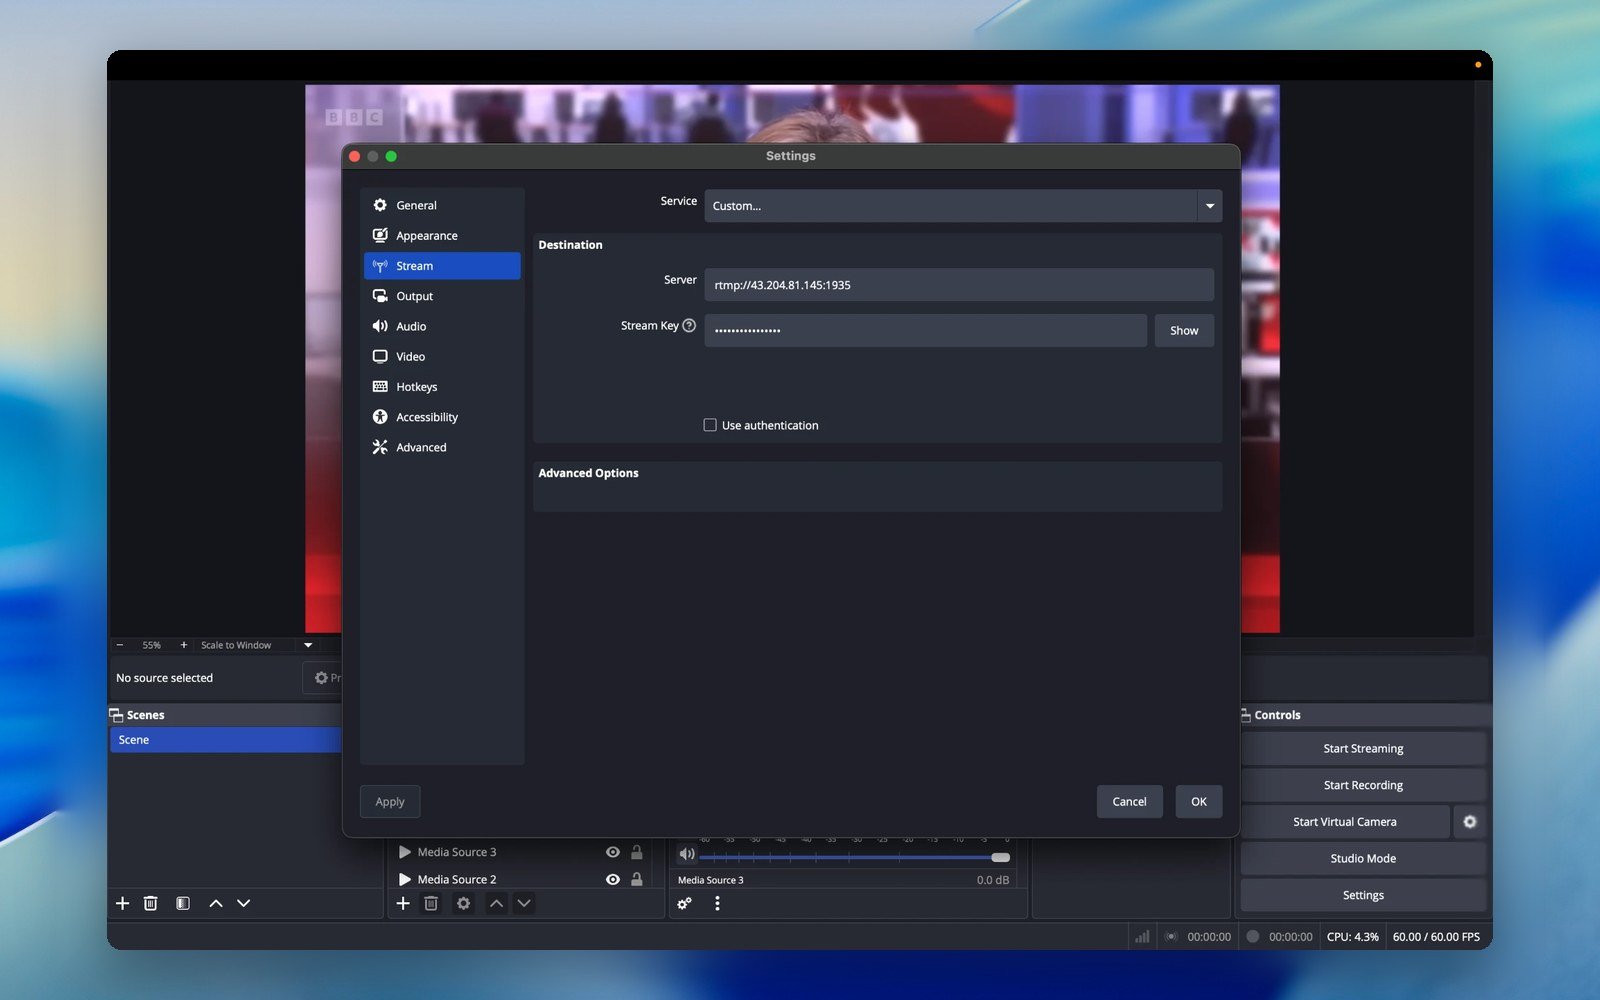
Any RTMP-compatible encoder works. In OBS Studio:
1. Open **Settings → Stream** and set **Service** to **Custom**.
2. Paste the **RTMP URL (Primary)** into **Server** and the **Stream Key (Primary)** into **Stream Key**, then select **OK**.
3. Select **Start Streaming** when you are ready to send the signal.
***
## Connect your streaming software
Any RTMP-compatible encoder works. In OBS Studio:
1. Open **Settings → Stream** and set **Service** to **Custom**.
2. Paste the **RTMP URL (Primary)** into **Server** and the **Stream Key (Primary)** into **Stream Key**, then select **OK**.
3. Select **Start Streaming** when you are ready to send the signal.
 Treat the Stream Key like a password: anyone who has both the URL and the key can push video into your livestream.
***
## Run the live session
On the Library card menu or the asset page, choose **Start live session**. Tessact starts the stream receiver and the asset page begins polling for a signal.
Treat the Stream Key like a password: anyone who has both the URL and the key can push video into your livestream.
***
## Run the live session
On the Library card menu or the asset page, choose **Start live session**. Tessact starts the stream receiver and the asset page begins polling for a signal.
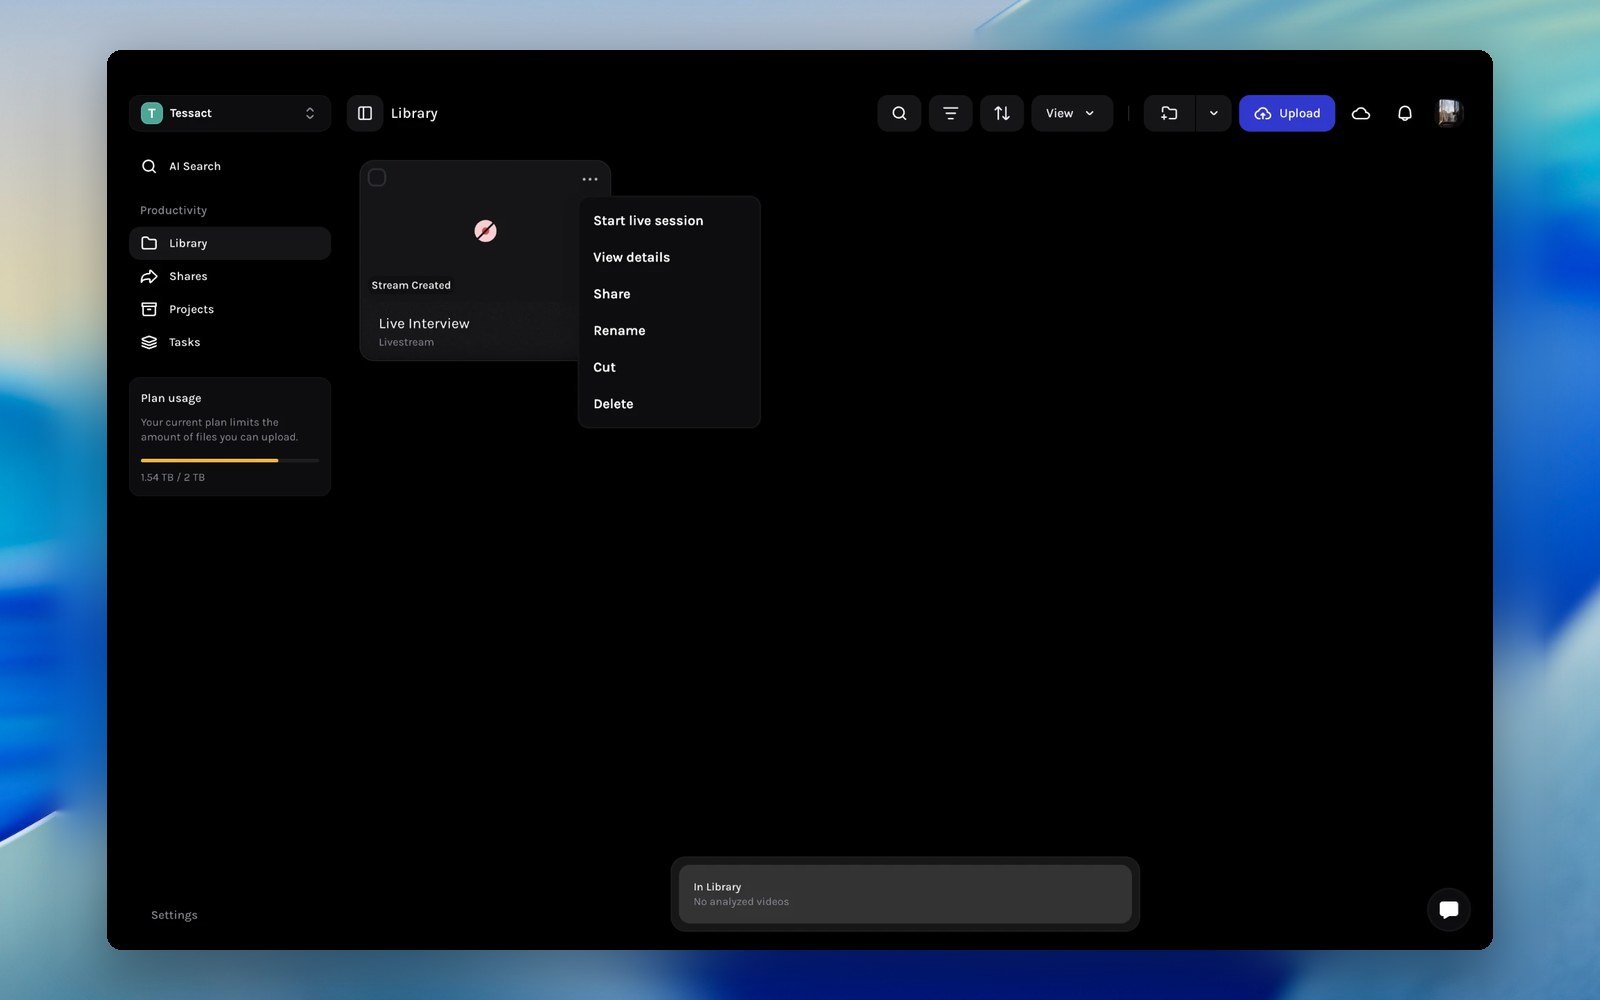 Until your encoder starts pushing, the asset page shows **Waiting for signal**. You can already enable **Start recording** here if you want capture to begin the moment the signal arrives.
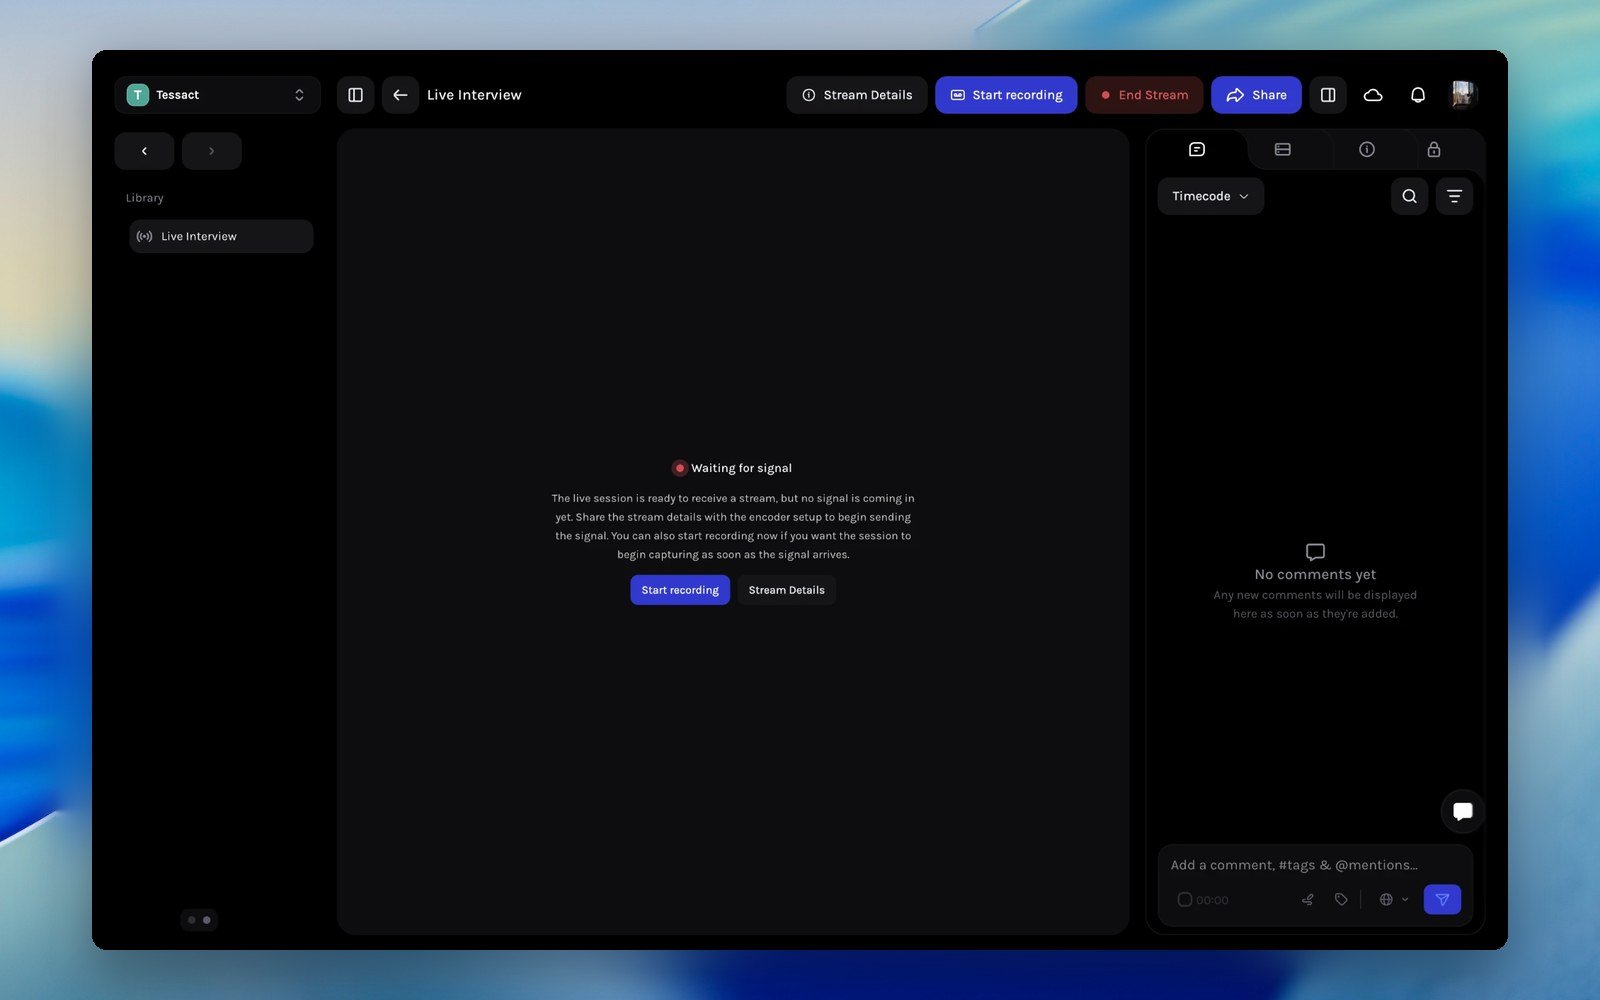 Begin streaming in OBS (or your encoder of choice). When the feed reaches Tessact, the page switches to **Signal Detected**.
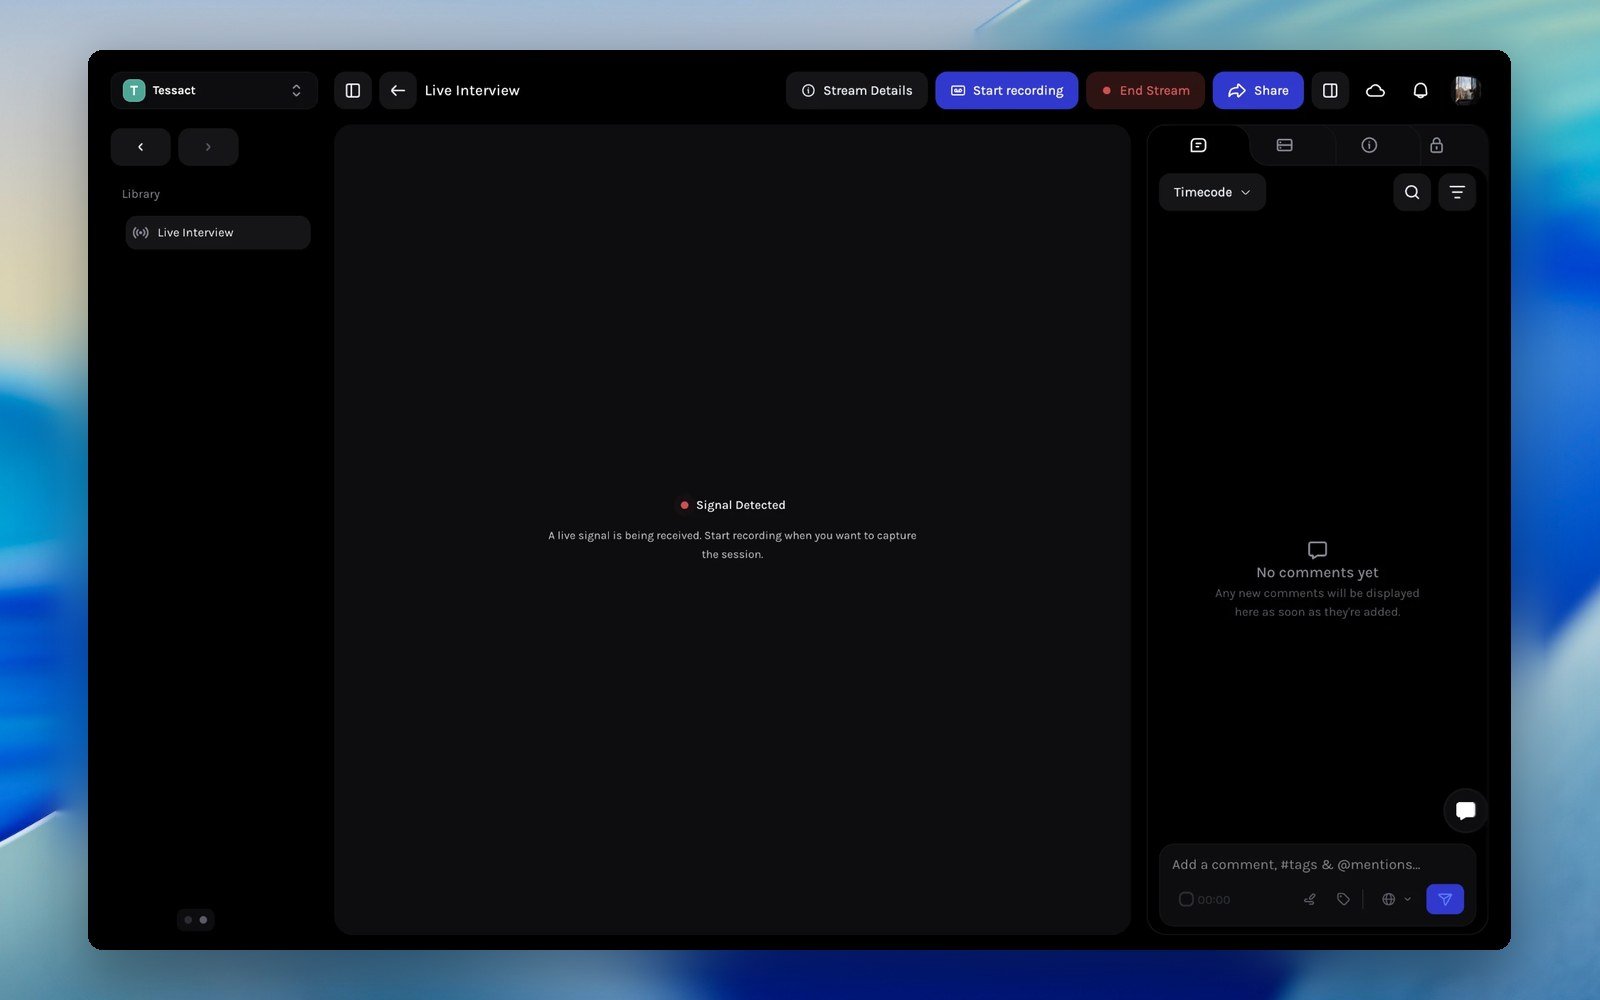 Select **Start recording** to begin capturing the session. The status changes to **Recording in progress**, live playback becomes available, and recorded media keeps appearing as new chunks are prepared.
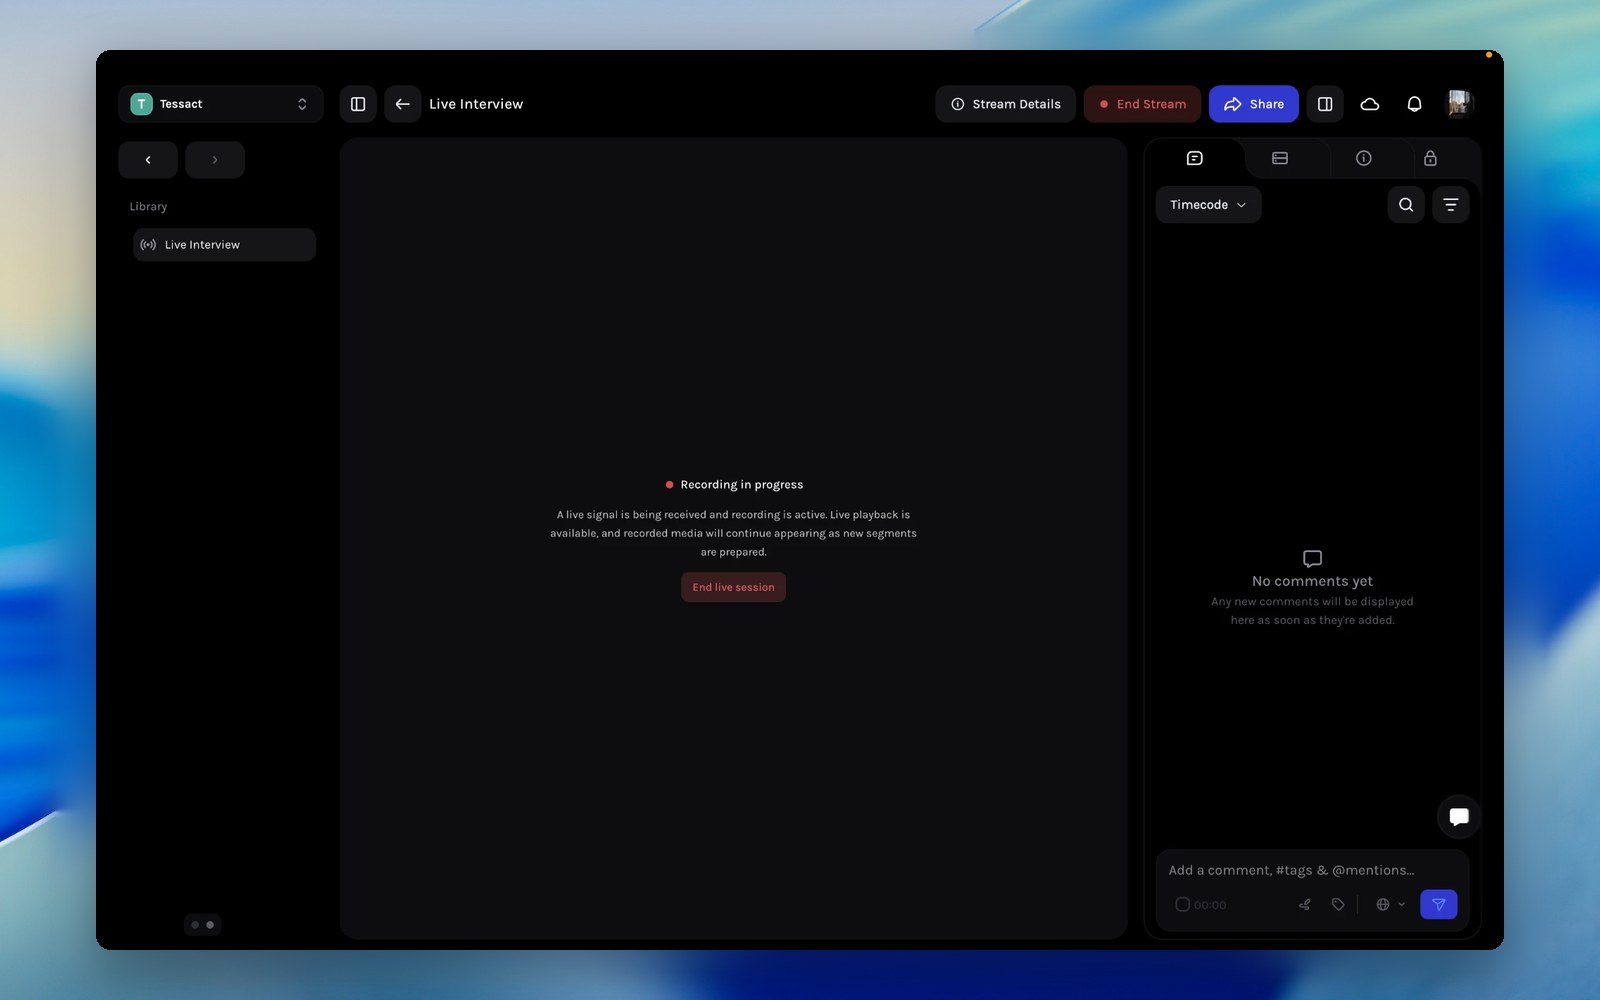 Recording is what produces recorded chunks and the final archive. Going live without recording is useful for a signal check; start recording before the moment you actually want to keep.
***
## Watch, comment, and share
While the session runs, the asset page plays the live feed with the standard Tessact player. The **Comments** panel works exactly as it does for uploaded videos: comments are timecoded, support `#tags` and `@mentions`, and notify collaborators. Use **Share** to give teammates access, and the Library card shows the live state at a glance (a pulsing red indicator with the current status).
***
## Edit while it is still live
You can cut a livestream in the Editor before the stream ends:
1. In the **Library**, create a **New video draft** and open it.
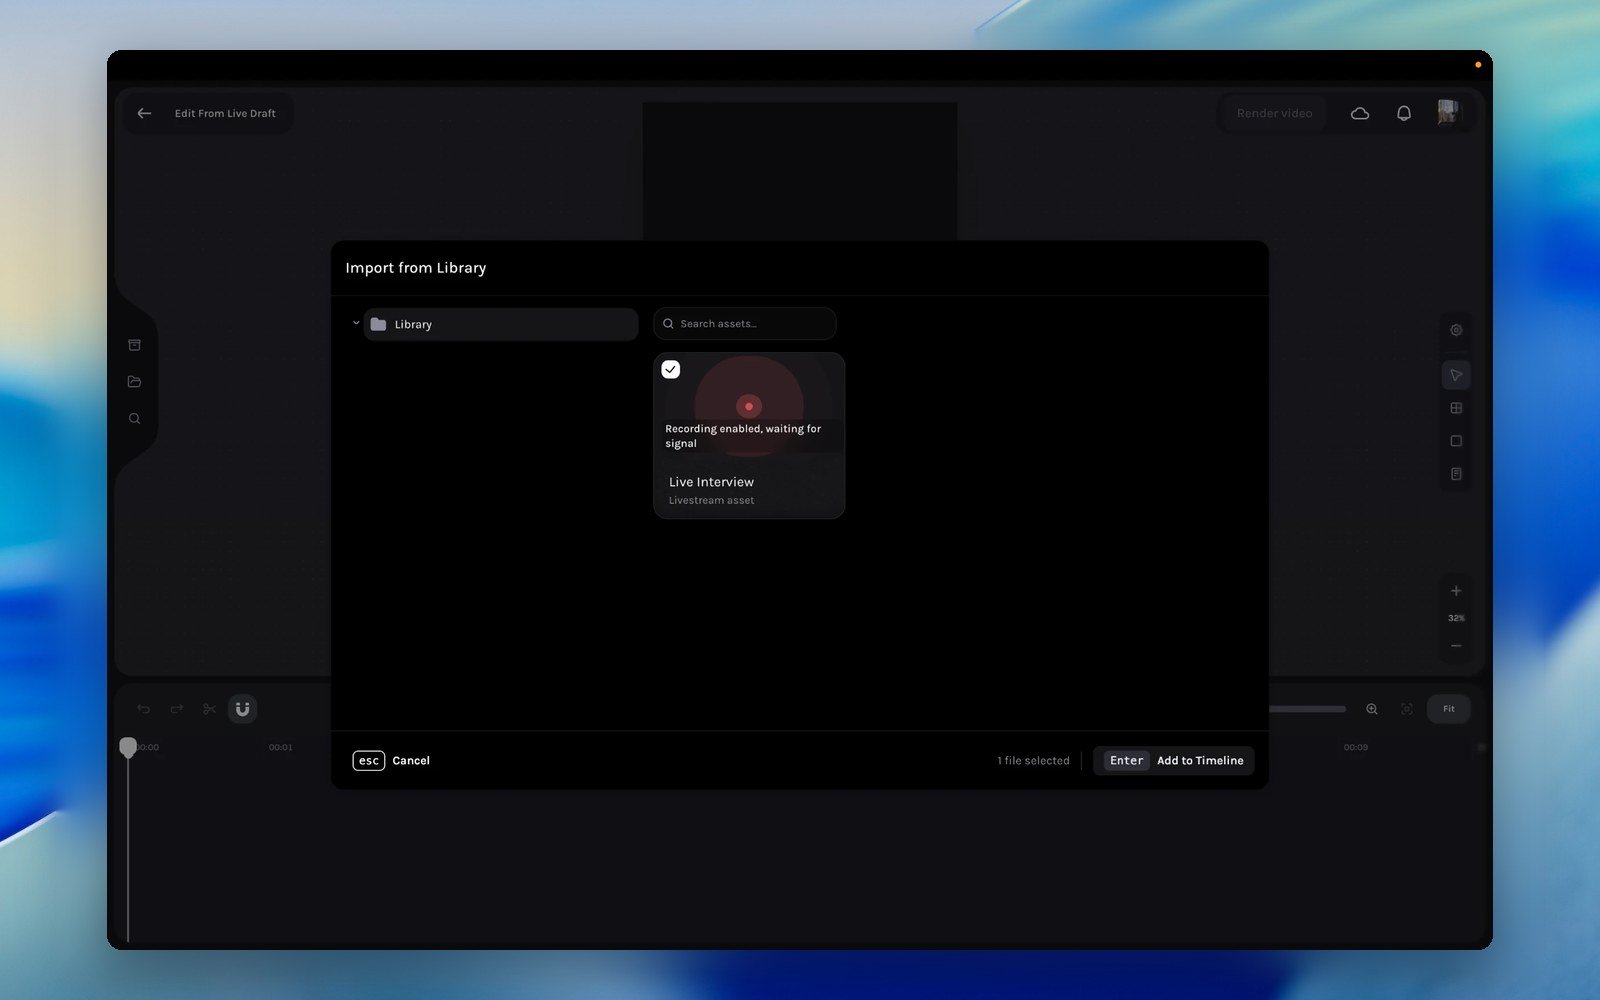
2. In the Editor, open **Library**, select the livestream, and choose **Add to Timeline**.
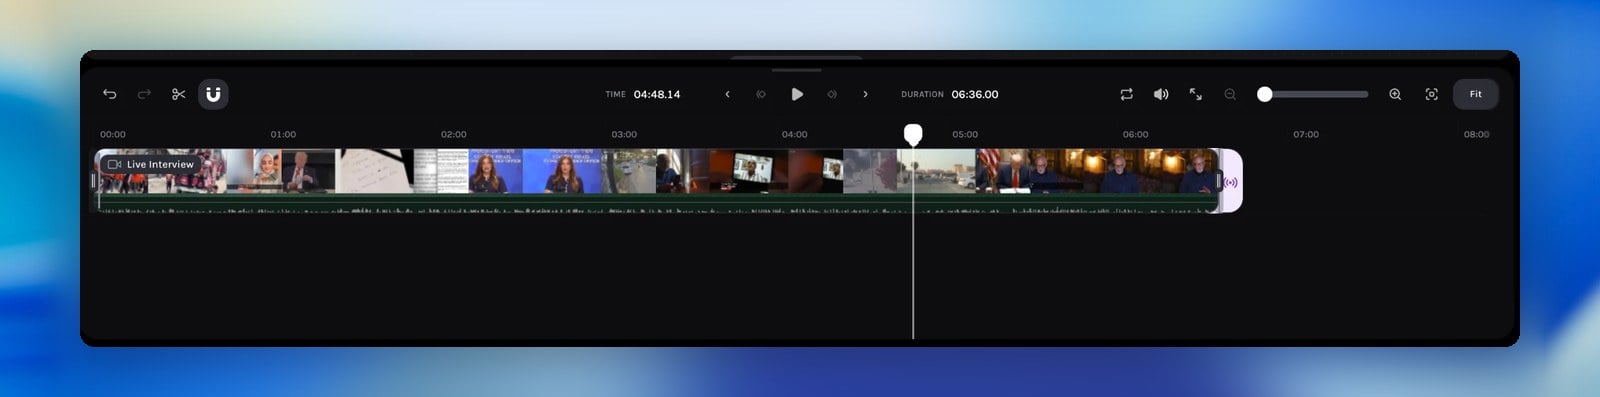
3. The ready chunks appear as one grouped clip with filmstrips and waveforms, ready to trim and arrange.
Recording is what produces recorded chunks and the final archive. Going live without recording is useful for a signal check; start recording before the moment you actually want to keep.
***
## Watch, comment, and share
While the session runs, the asset page plays the live feed with the standard Tessact player. The **Comments** panel works exactly as it does for uploaded videos: comments are timecoded, support `#tags` and `@mentions`, and notify collaborators. Use **Share** to give teammates access, and the Library card shows the live state at a glance (a pulsing red indicator with the current status).
***
## Edit while it is still live
You can cut a livestream in the Editor before the stream ends:
1. In the **Library**, create a **New video draft** and open it.
2. In the Editor, open **Library**, select the livestream, and choose **Add to Timeline**.
3. The ready chunks appear as one grouped clip with filmstrips and waveforms, ready to trim and arrange.
 The livestream is a growing timeline. As new chunks finish, the end of the layer shows a purple livestream control. Select **Update live stream** to append the latest recorded material as an ordinary, undoable edit.
 For grouped-clip behaviour, trims, and troubleshooting inside the Editor, see [Livestream sources](/editor/media/livestream-sources).
***
## End the session and archive
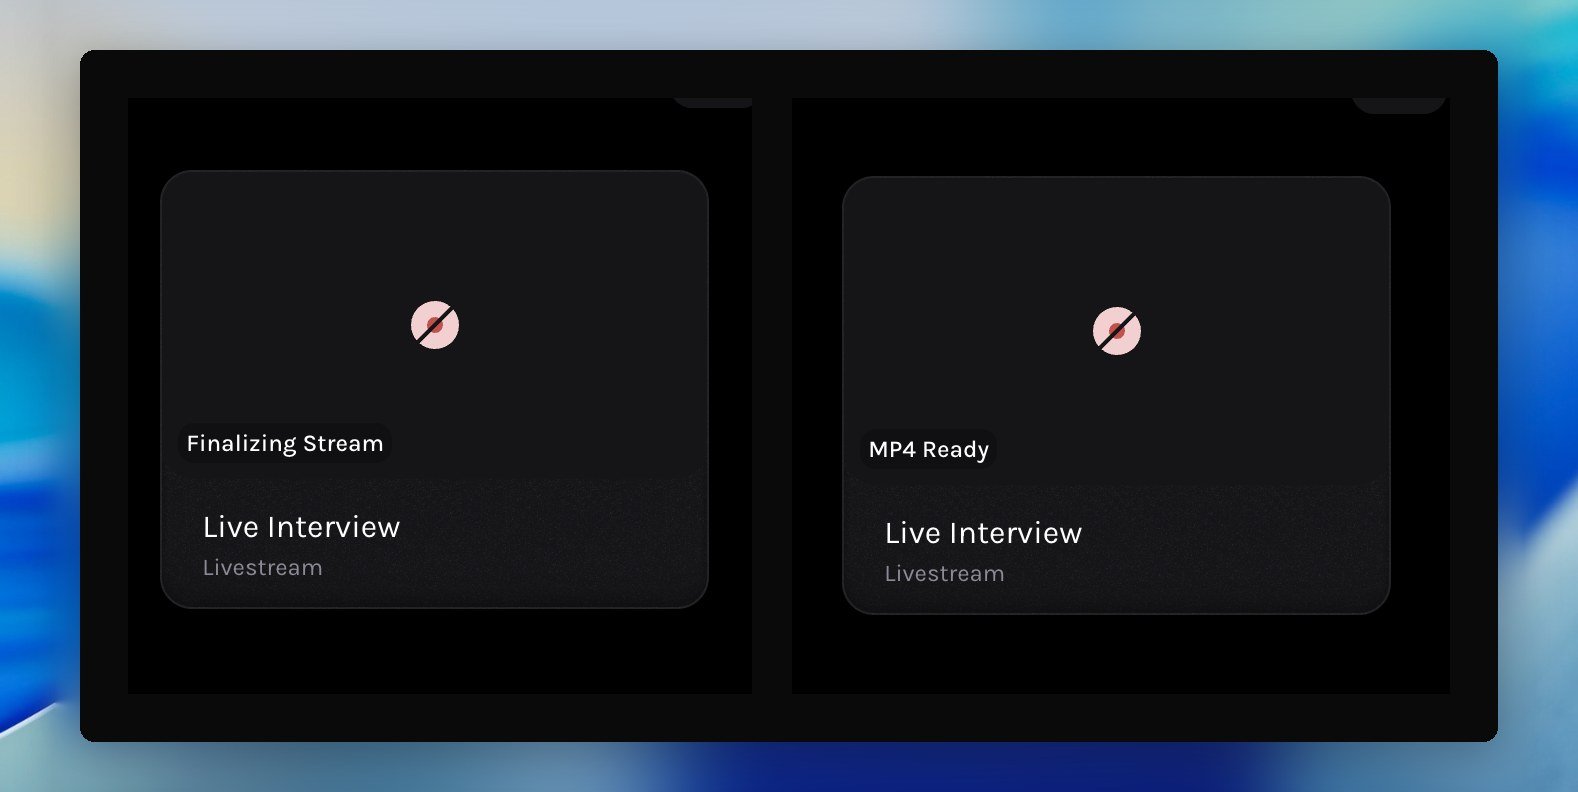
When the broadcast is over, choose **End live session** (also available as **End Stream** on the Library card menu). Tessact captures the trailing partial chunk, then stitches every recorded chunk into a single MP4. The Library card shows **Finalizing Stream** while this happens and settles on **MP4 Ready**, at which point the asset page plays the full recording like any other video. The recording stays in your Library; ending a stream tears down the live infrastructure, not the captured media.
For grouped-clip behaviour, trims, and troubleshooting inside the Editor, see [Livestream sources](/editor/media/livestream-sources).
***
## End the session and archive
When the broadcast is over, choose **End live session** (also available as **End Stream** on the Library card menu). Tessact captures the trailing partial chunk, then stitches every recorded chunk into a single MP4. The Library card shows **Finalizing Stream** while this happens and settles on **MP4 Ready**, at which point the asset page plays the full recording like any other video. The recording stays in your Library; ending a stream tears down the live infrastructure, not the captured media.
 ***
## Status reference
| Status | Meaning | What to do |
| ------------------------- | ----------------------------------------------------------------------------------- | ------------------------------------------------------------------------------------------------------------------------------ |
| **Preparing Stream** | Tessact is provisioning the stream receiver | Wait; streaming details appear when setup finishes |
| **Stream Created** | Ingest is ready; the session has not started | Share the RTMP details with the encoder, then start the live session |
| **Waiting for signal** | The session is live-ready but no feed is arriving | Start streaming from your encoder; optionally enable recording (the card then shows **Recording enabled, waiting for signal**) |
| **Signal Detected** | A live signal is being received | Start recording when you want to capture |
| **Recording in progress** | The signal is being captured in chunks | Watch, comment, and edit; end the session when done |
| **Finalizing Stream** | The session has ended; the trailing chunk is captured and the recording is stitched | Wait; this includes a short grace period after the signal stops |
| **MP4 Ready** | The stitched recording is available | Play, share, and edit it like any uploaded video |
| **Stream Failed** | Provisioning or streaming hit an error | Check **Stream Details** for the reason, or create a fresh livestream |
***
## AI features on live content
Because the session is captured in chunks, Tessact's AI can work on the stream while it is still running:
* **Search during the stream:** each finished chunk is indexed, so scenes, shots, and dialogue from earlier in the session surface in [AI Search](/ai-search) before the stream ends.
* **Transcripts and detections:** the asset's Metadata panel fills with transcriptions, keywords, and detected people as chunks complete.
* **Faster with shorter chunks:** a 1 to 5 minute chunk size makes live AI results appear sooner; longer chunks favour deeper per-segment context.
***
## Related guides
Find moments from your livestreams, and everything else in the Library, by describing them.
How growing livestreams behave on the timeline: chunk groups, updates, and safe trimming.
Timecoded comments, #tags, and @mentions work on live sessions too.
***
You can now provision a livestream, push a signal from any RTMP encoder, record the session in chunks, collaborate on it live, and archive it as a searchable asset.
***
## Status reference
| Status | Meaning | What to do |
| ------------------------- | ----------------------------------------------------------------------------------- | ------------------------------------------------------------------------------------------------------------------------------ |
| **Preparing Stream** | Tessact is provisioning the stream receiver | Wait; streaming details appear when setup finishes |
| **Stream Created** | Ingest is ready; the session has not started | Share the RTMP details with the encoder, then start the live session |
| **Waiting for signal** | The session is live-ready but no feed is arriving | Start streaming from your encoder; optionally enable recording (the card then shows **Recording enabled, waiting for signal**) |
| **Signal Detected** | A live signal is being received | Start recording when you want to capture |
| **Recording in progress** | The signal is being captured in chunks | Watch, comment, and edit; end the session when done |
| **Finalizing Stream** | The session has ended; the trailing chunk is captured and the recording is stitched | Wait; this includes a short grace period after the signal stops |
| **MP4 Ready** | The stitched recording is available | Play, share, and edit it like any uploaded video |
| **Stream Failed** | Provisioning or streaming hit an error | Check **Stream Details** for the reason, or create a fresh livestream |
***
## AI features on live content
Because the session is captured in chunks, Tessact's AI can work on the stream while it is still running:
* **Search during the stream:** each finished chunk is indexed, so scenes, shots, and dialogue from earlier in the session surface in [AI Search](/ai-search) before the stream ends.
* **Transcripts and detections:** the asset's Metadata panel fills with transcriptions, keywords, and detected people as chunks complete.
* **Faster with shorter chunks:** a 1 to 5 minute chunk size makes live AI results appear sooner; longer chunks favour deeper per-segment context.
***
## Related guides
Find moments from your livestreams, and everything else in the Library, by describing them.
How growing livestreams behave on the timeline: chunk groups, updates, and safe trimming.
Timecoded comments, #tags, and @mentions work on live sessions too.
***
You can now provision a livestream, push a signal from any RTMP encoder, record the session in chunks, collaborate on it live, and archive it as a searchable asset.