> ## Documentation Index
> Fetch the complete documentation index at: https://docs.tessact.ai/llms.txt
> Use this file to discover all available pages before exploring further.
# Quick Start
> Sign up, upload your first asset, and run AI-powered actions in minutes.
## Before you begin
Before you get started, make sure you have:
* **An Invitation email** — You must receive a Tessact invite from our team before you can sign up.
Request an invite from our team
* **Your assets** — You can upload any media file to Tessact. However for best performance, we recommend H.264/AAC `.mp4` under 12 Mb/s. For more information see [supported media formats](media-formats).
The invitation link on the email expires after 24 hours for added security. If
it lapses, use Login with OTP on the [login](https://app.tessact.ai/login)
page instead.
***
## 1. Set up your account
When you [log in to tessact](https://app.tessact.ai/login) for the very first time, you will be asked to set up your account.
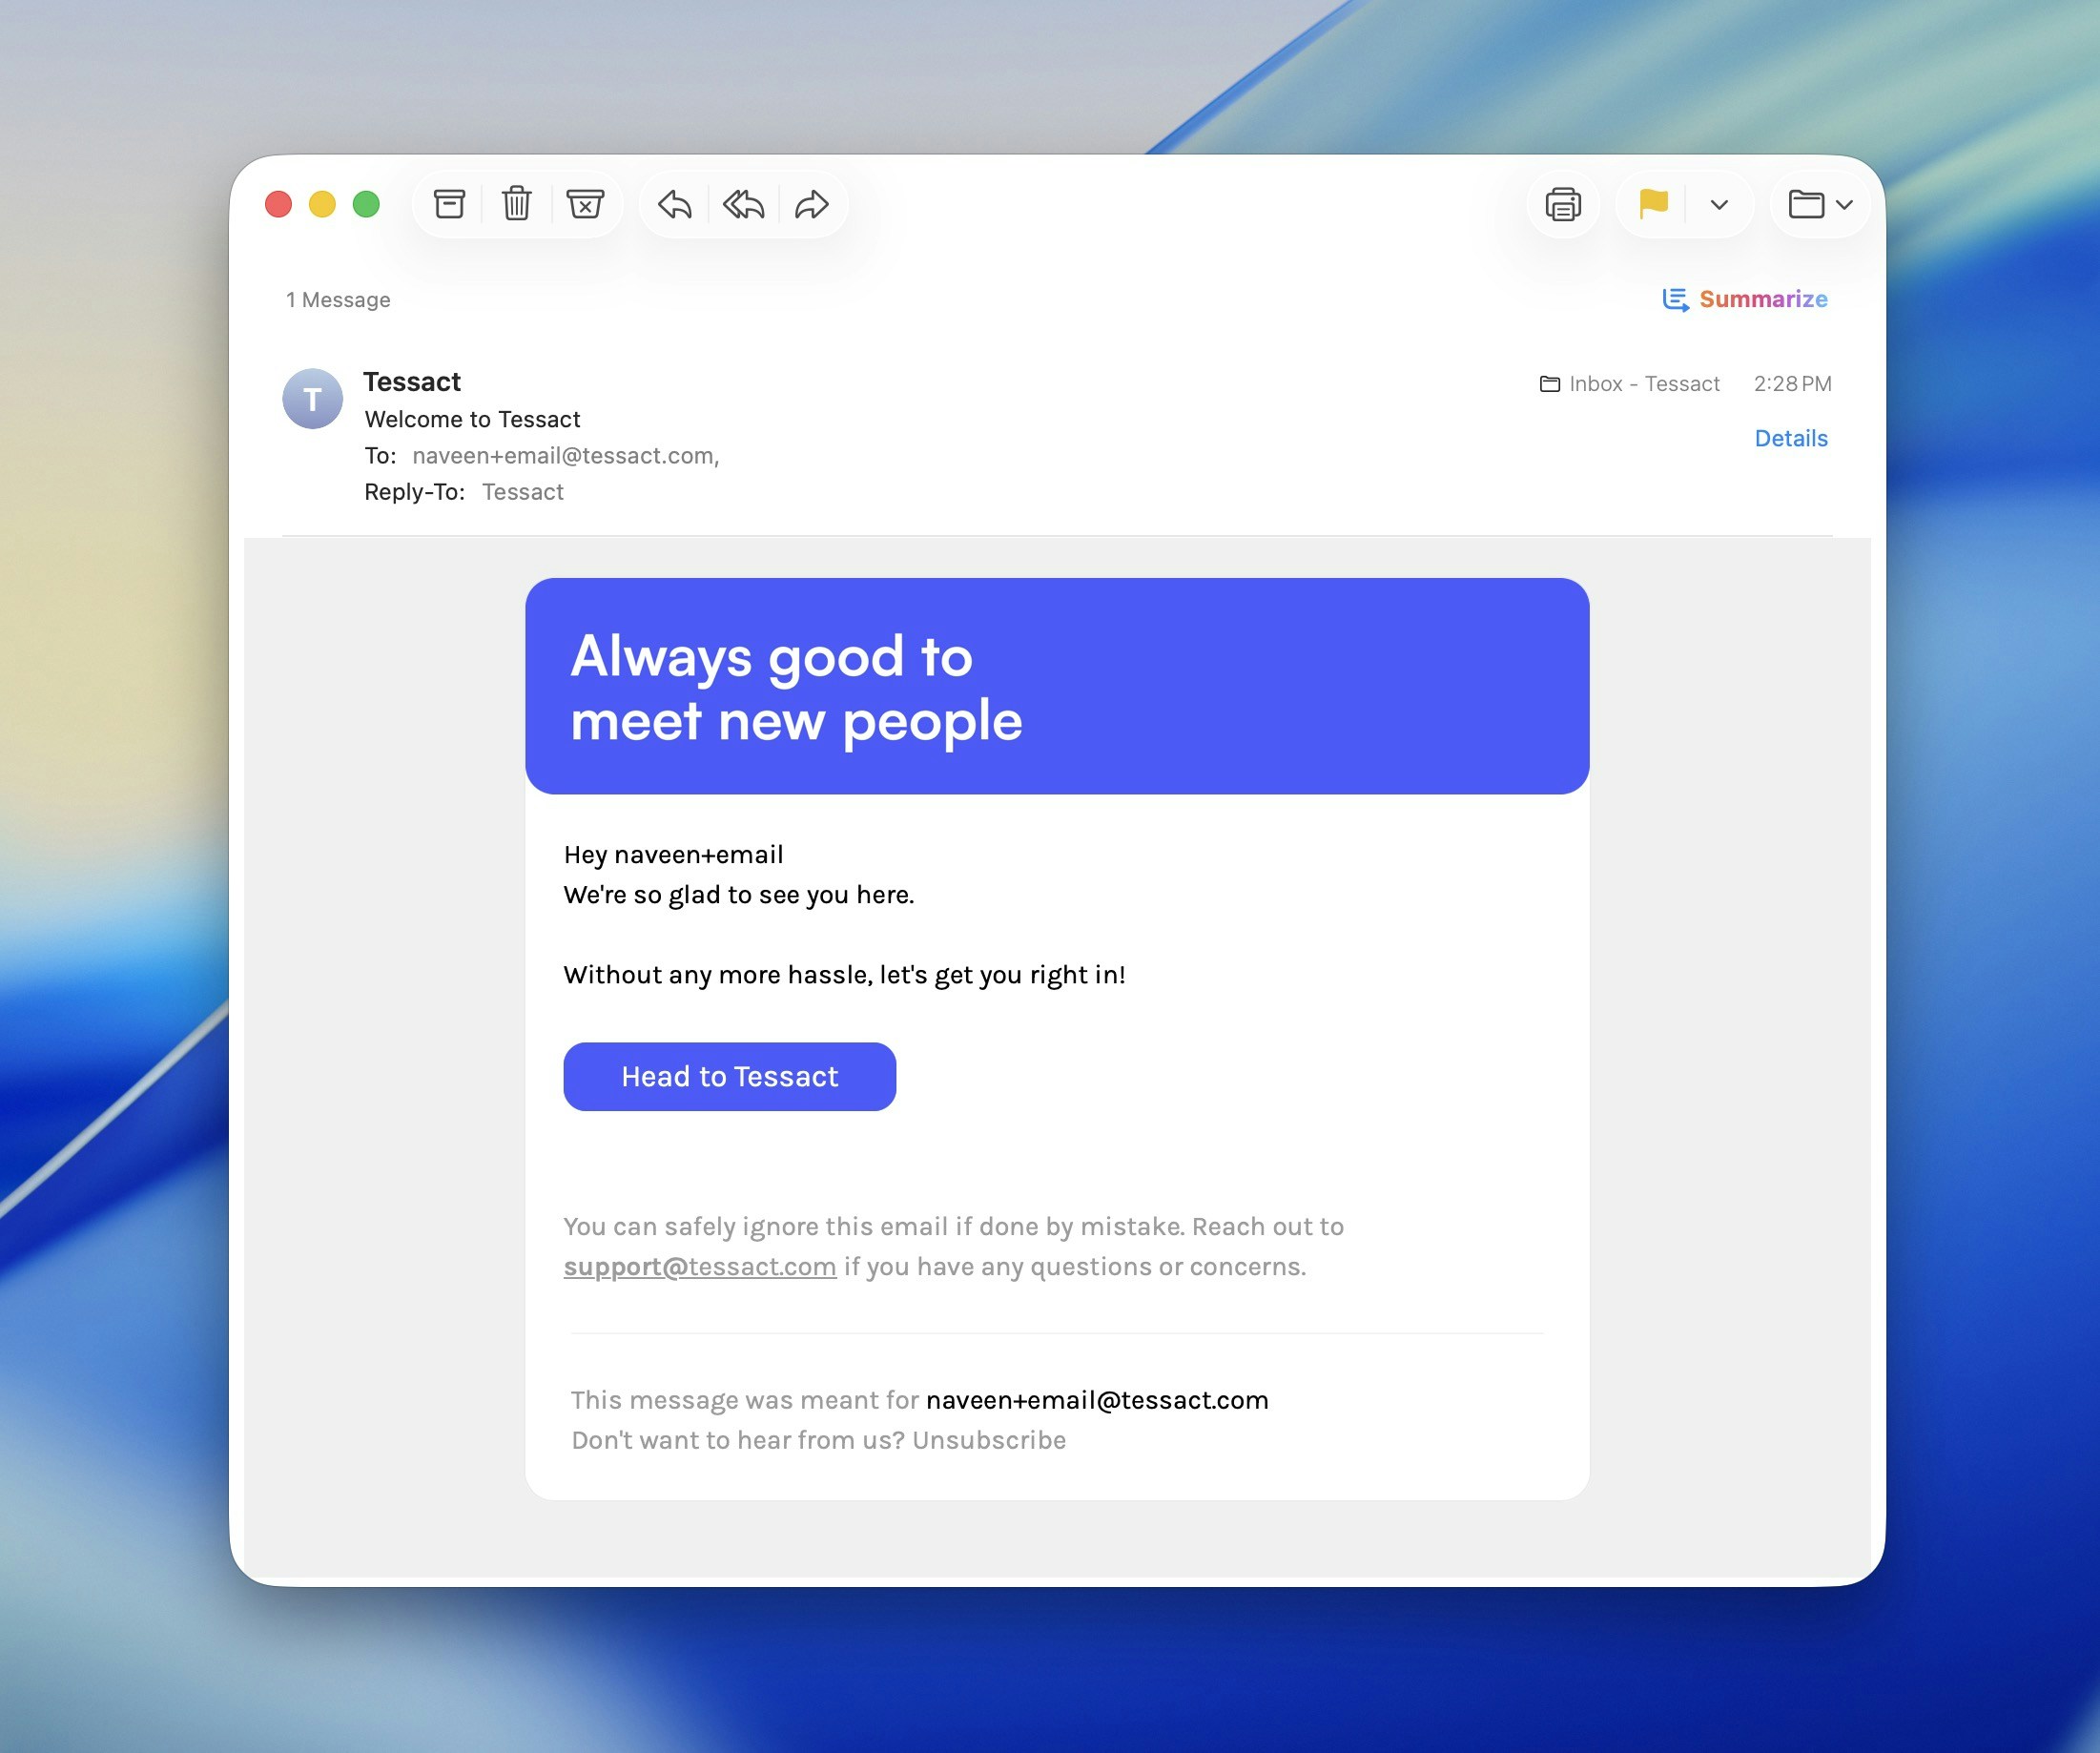 Click **Head to Tessact**.
*If you don’t see the email, check your spam or promotions folder.*
Set up your profile including your name, avatar, organisation, and password, and submit.
*Password must be at least 8 characters and include a number or symbol.*
If your invite is no longer valid, go to [https://app.tessact.ai/login](https://app.tessact.ai/login) → **Login with OTP** → enter your email → use the one-time code sent to you.
1. Navigate to [**https://app.tessact.ai/login**](https://app.tessact.ai/login).
Click **Head to Tessact**.
*If you don’t see the email, check your spam or promotions folder.*
Set up your profile including your name, avatar, organisation, and password, and submit.
*Password must be at least 8 characters and include a number or symbol.*
If your invite is no longer valid, go to [https://app.tessact.ai/login](https://app.tessact.ai/login) → **Login with OTP** → enter your email → use the one-time code sent to you.
1. Navigate to [**https://app.tessact.ai/login**](https://app.tessact.ai/login).
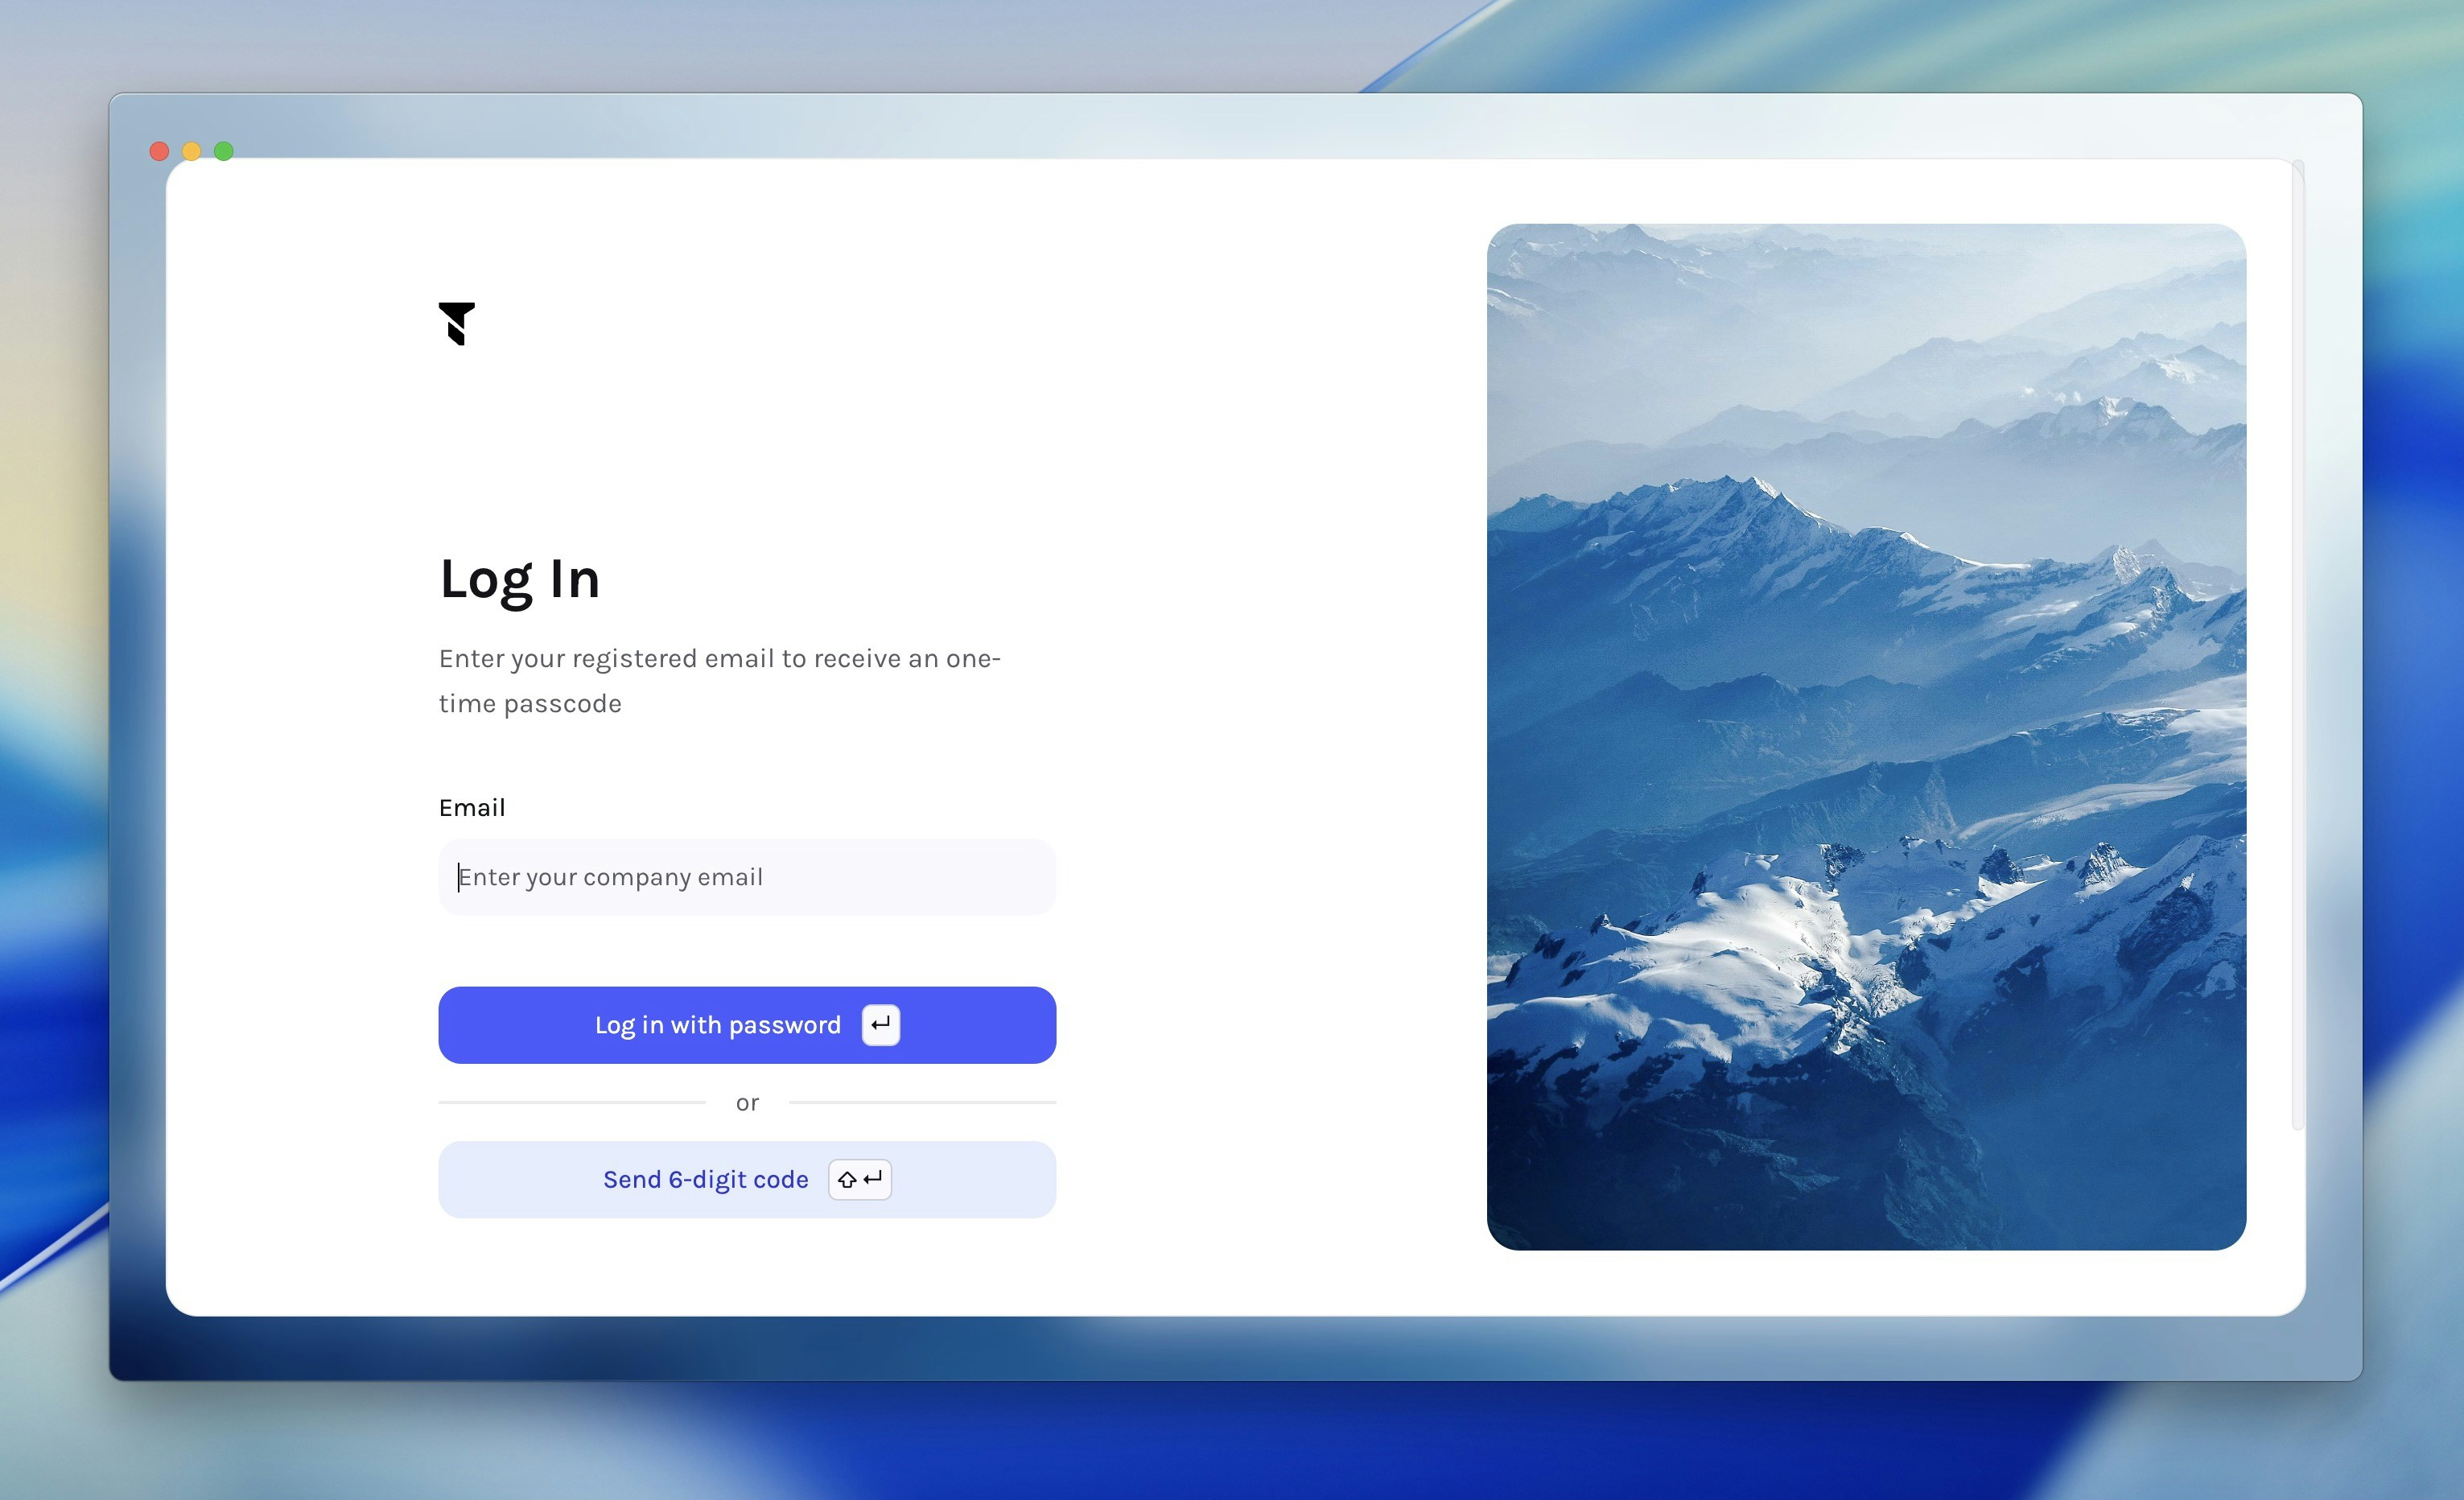 2. Sign in with your password *or* choose **Send 6-digit code** if you prefer one-time codes.
Successful login redirects you to the **Library** containing sample assets.
You can still set up your profile including your name, avatar, organisation, and password by navigating to Profile icon → Preferences → Profile.
***
## 2. Explore the Library
2. Sign in with your password *or* choose **Send 6-digit code** if you prefer one-time codes.
Successful login redirects you to the **Library** containing sample assets.
You can still set up your profile including your name, avatar, organisation, and password by navigating to Profile icon → Preferences → Profile.
***
## 2. Explore the Library
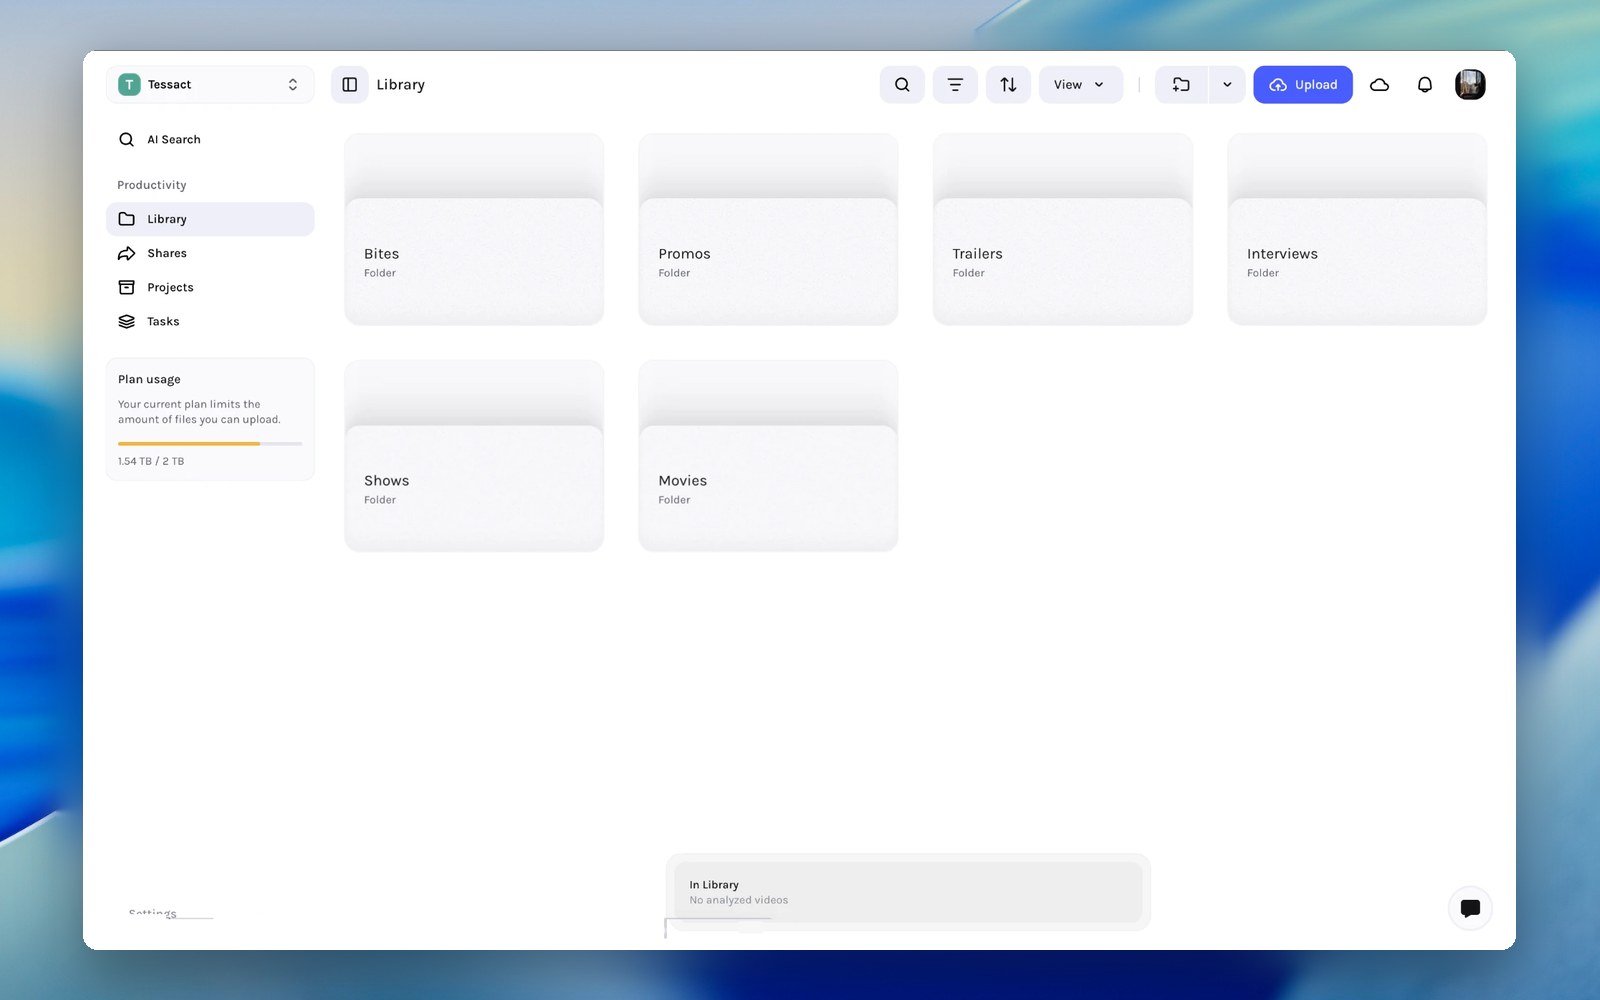 * Notice the **Upload** button and drag-and-drop zone.
* AI status badges display ingest, transcode, and analysis progress for each asset.
Delete any sample assets if you don't need them via **⋯ → Delete**.
***
## 3. Upload your first asset
Click **Upload** on the top right of the screen or drag your media into the Library.
For the fastest turnaround, follow the [supported media formats](/media-formats) guide.
* Notice the **Upload** button and drag-and-drop zone.
* AI status badges display ingest, transcode, and analysis progress for each asset.
Delete any sample assets if you don't need them via **⋯ → Delete**.
***
## 3. Upload your first asset
Click **Upload** on the top right of the screen or drag your media into the Library.
For the fastest turnaround, follow the [supported media formats](/media-formats) guide.
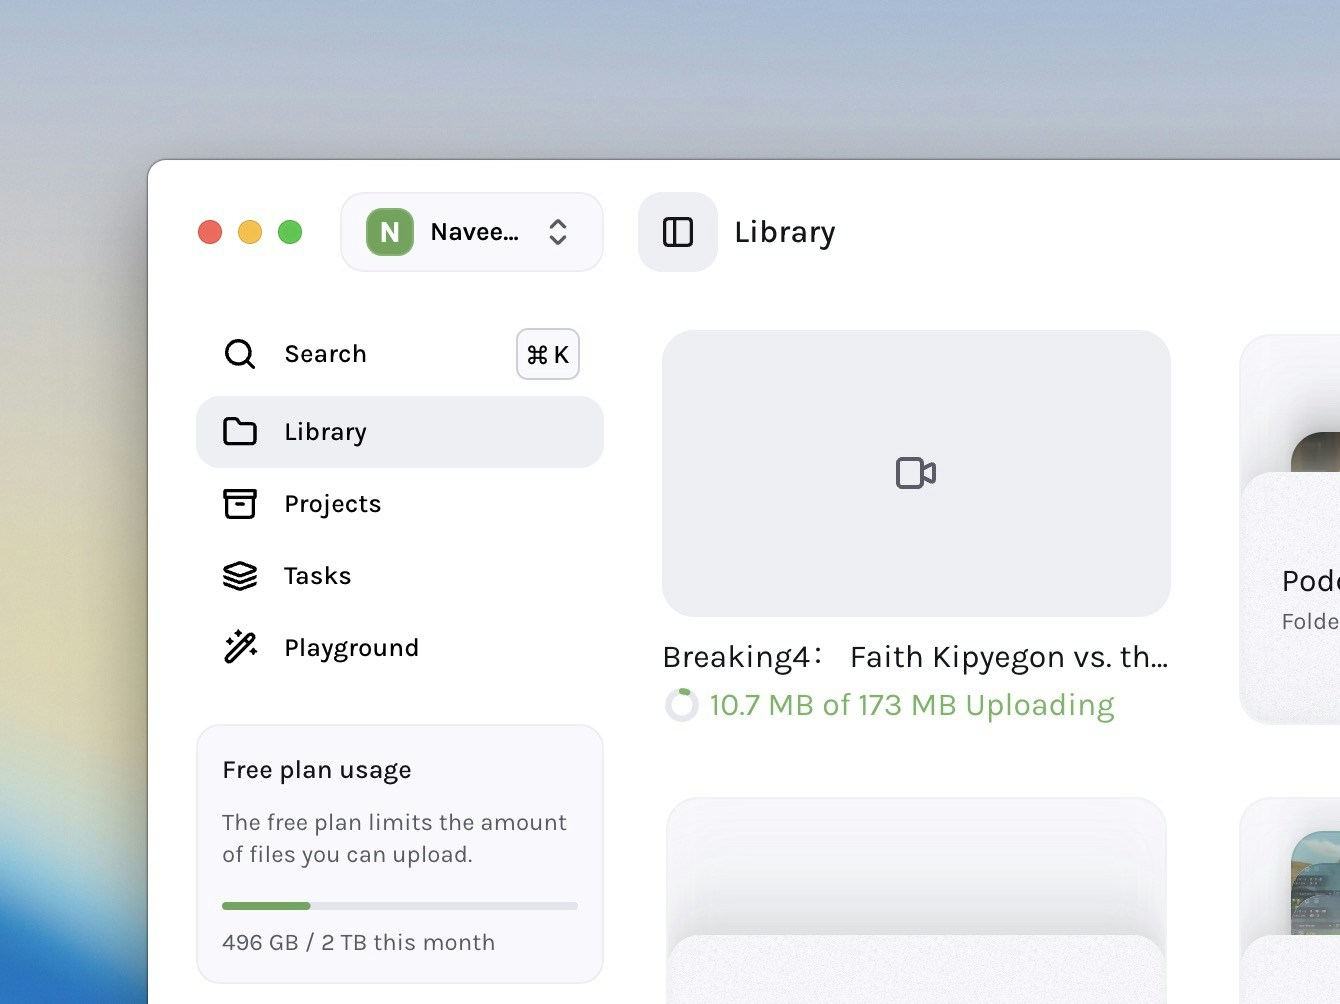 Tessact uploads and queues the file for AI analysis. A progress pill appears on the asset card showing the progress of the analysis.
Average analysis speed is **≈ 15 minutes per hour of H.264/AAC content under
10 Mb/s**. [Non-preferred codecs](/media-formats) or higher bitrates trigger
transcoding and extend processing time.
***
## 4. Trigger AI actions
Once your asset is analysed, you can trigger AI actions on it.
You can upload as many files as you want to the Library and trigger AI actions
on them all.
### Remix (create social clips)
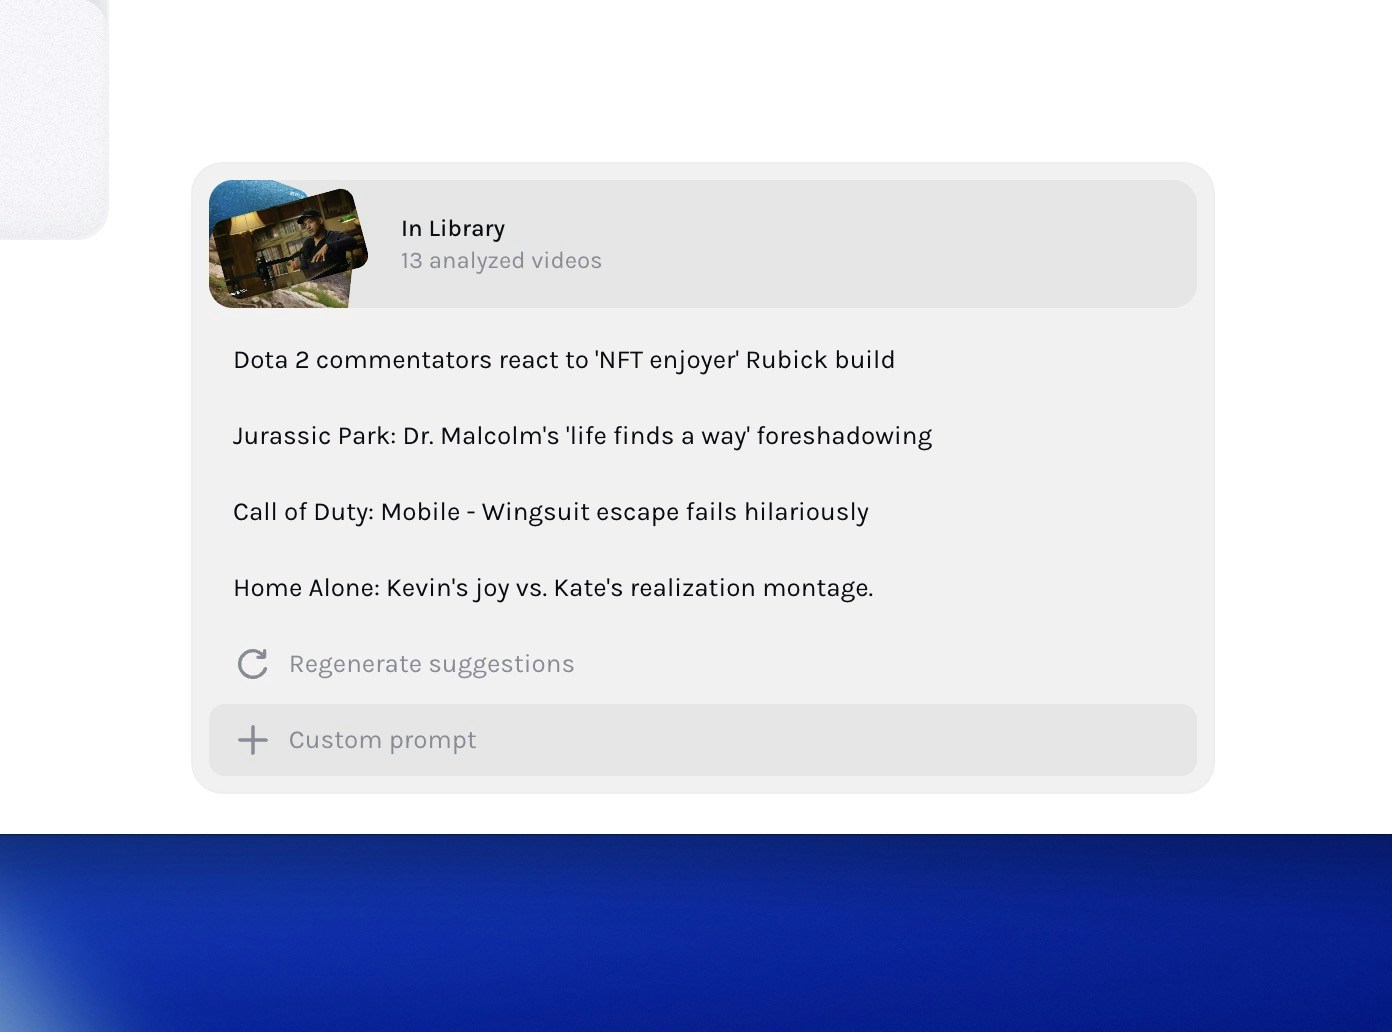
Once analysing is finished, you can see the Remix bar at the bottom of the screen. Hovering on the suggestions will show you more suggestions for clips you can create with AI, or allow you to write your own prompt.
Learn more about how Tessact's Remix AI works.
Learn more about how to write prompts for Tessact's Remix AI.
Pick a suggested prompt from the list or write your own (e.g., “Generate a
15-sec teaser”).
Tessact uploads and queues the file for AI analysis. A progress pill appears on the asset card showing the progress of the analysis.
Average analysis speed is **≈ 15 minutes per hour of H.264/AAC content under
10 Mb/s**. [Non-preferred codecs](/media-formats) or higher bitrates trigger
transcoding and extend processing time.
***
## 4. Trigger AI actions
Once your asset is analysed, you can trigger AI actions on it.
You can upload as many files as you want to the Library and trigger AI actions
on them all.
### Remix (create social clips)
Once analysing is finished, you can see the Remix bar at the bottom of the screen. Hovering on the suggestions will show you more suggestions for clips you can create with AI, or allow you to write your own prompt.
Learn more about how Tessact's Remix AI works.
Learn more about how to write prompts for Tessact's Remix AI.
Pick a suggested prompt from the list or write your own (e.g., “Generate a
15-sec teaser”).
 Tessact generates multiple aspect-ratio variants ready for download or
review.
### AI Search for clips
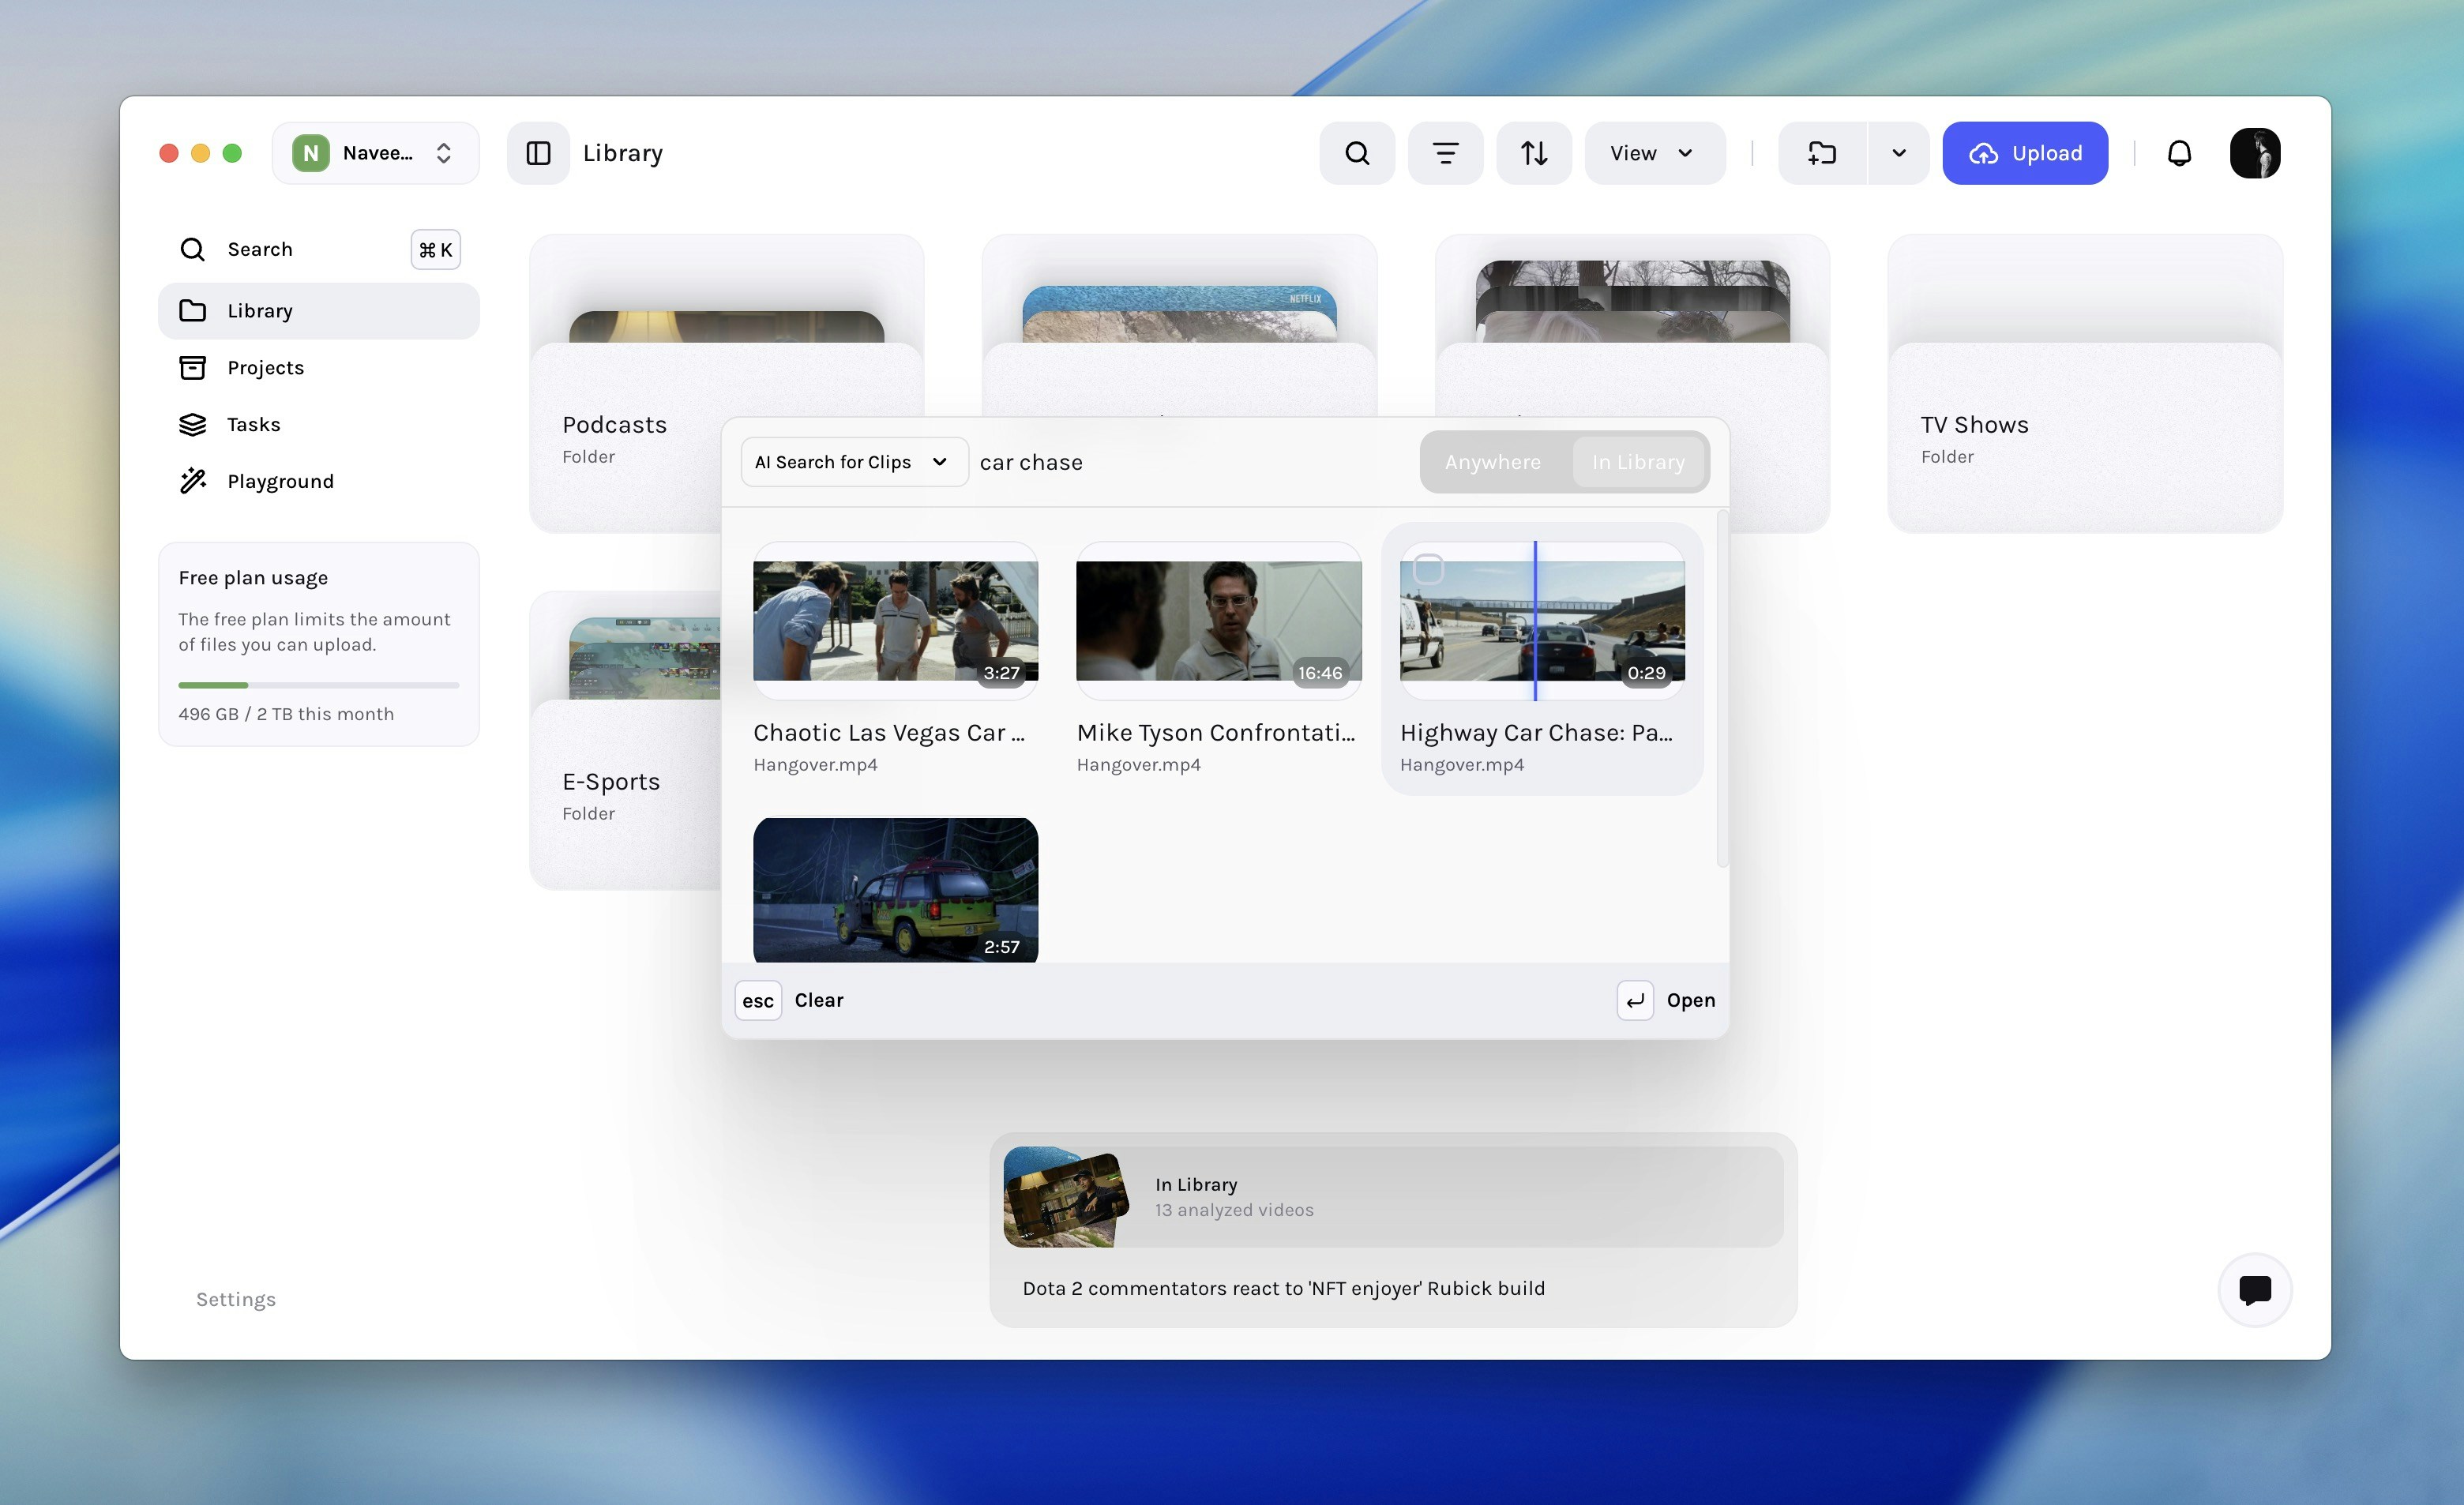
AI search for clips is a powerful way to find the perfect clips for your next project. It works on not just the content in each scene, but also on the contextual understanding of the scene in relation to the overall content.
Learn more about how Tessact's AI search works.
Press ⌘/Ctrl + K → AI Search for clips
Tessact generates multiple aspect-ratio variants ready for download or
review.
### AI Search for clips
AI search for clips is a powerful way to find the perfect clips for your next project. It works on not just the content in each scene, but also on the contextual understanding of the scene in relation to the overall content.
Learn more about how Tessact's AI search works.
Press ⌘/Ctrl + K → AI Search for clips
*or*
Click the Search item on top of the left sidebar to open the AI Search
dialog.
Tessact finds ideal short clips that match your query that can be used in
your next project.
 ### AI Autofill metadata
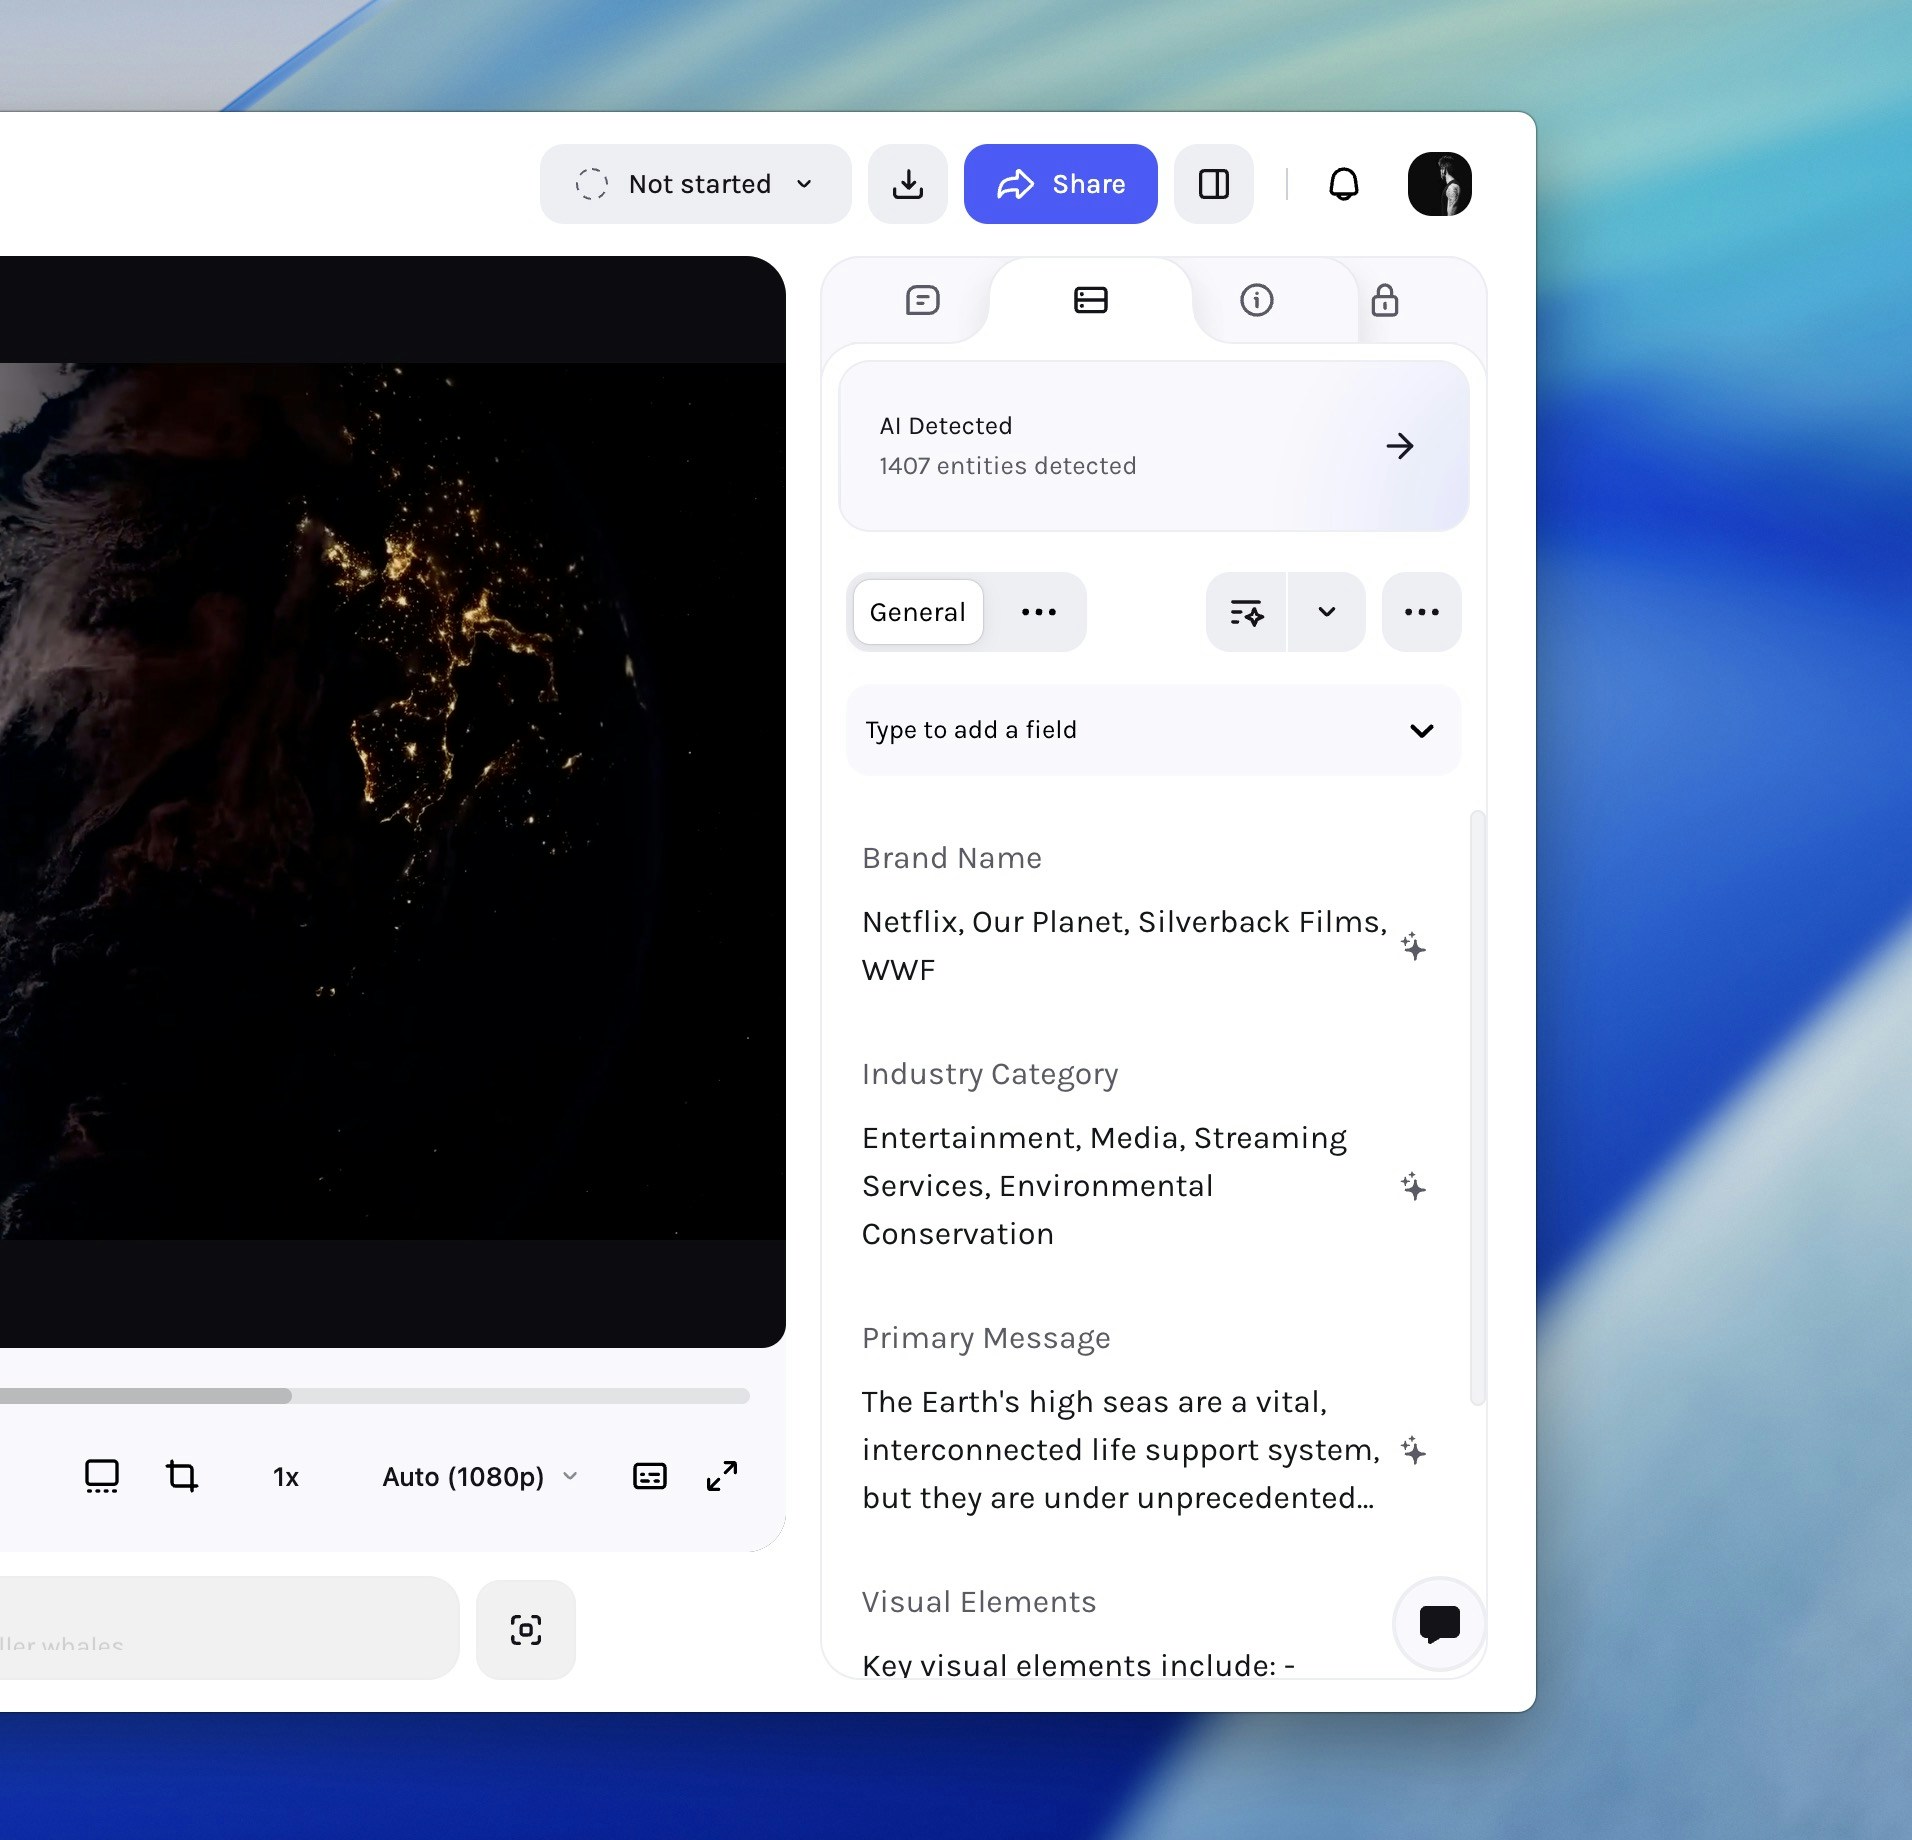
Tessact's deep understanding of video content allows it to automatically fill in any kind of metadata fields for you. Tessact is especially good at extracting qualitative as well as extremely accurate quantitative metadata (like timeframes, scores, and more) from videos.
Learn more about how Tessact's AI Autofill works.
Learn more about managing metadata in Tessact.
Clicking on any asset in the library will open the asset detail page. The asset detail page has a **Metadata** tab on the right panel that allows you to edit the metadata fields associated with the asset.
Click on the **Start from scratch** button to start from scratch and add your own fields, or select a pre-defined template from the list below.
You can also create a new template in the **Settings → Metadata** page.
Edit the automatically filled values by clicking on the field if needed.
### AI Autofill metadata
Tessact's deep understanding of video content allows it to automatically fill in any kind of metadata fields for you. Tessact is especially good at extracting qualitative as well as extremely accurate quantitative metadata (like timeframes, scores, and more) from videos.
Learn more about how Tessact's AI Autofill works.
Learn more about managing metadata in Tessact.
Clicking on any asset in the library will open the asset detail page. The asset detail page has a **Metadata** tab on the right panel that allows you to edit the metadata fields associated with the asset.
Click on the **Start from scratch** button to start from scratch and add your own fields, or select a pre-defined template from the list below.
You can also create a new template in the **Settings → Metadata** page.
Edit the automatically filled values by clicking on the field if needed.
 ***
You’ve uploaded your first asset, watched Tessact analyze it, and run AI
actions—all in just a few minutes. Continue by connecting cloud storage or
designing your own multi-agent workflow.
***
## Next steps
Follow the S3 Connections setup to connect your cloud storage.
Open Workflow Builder and see Creating Workflows to automate your processes.
Go to Settings → Users for User Management and collaboration.
Review AI Agents in Workflows to explore advanced AI capabilities.
***
***
You’ve uploaded your first asset, watched Tessact analyze it, and run AI
actions—all in just a few minutes. Continue by connecting cloud storage or
designing your own multi-agent workflow.
***
## Next steps
Follow the S3 Connections setup to connect your cloud storage.
Open Workflow Builder and see Creating Workflows to automate your processes.
Go to Settings → Users for User Management and collaboration.
Review AI Agents in Workflows to explore advanced AI capabilities.
***