In Tessact, workspace membership changes can start from the Users directory instead of only from an individual workspace. This matters when admins think in terms of people first:
where does this user already have access?
where should that access change?
is the same change needed for several users at once?
That is why the user directory includes workspace-aware columns and bulk membership actions.
Bulk workspace membership flow from the users directory
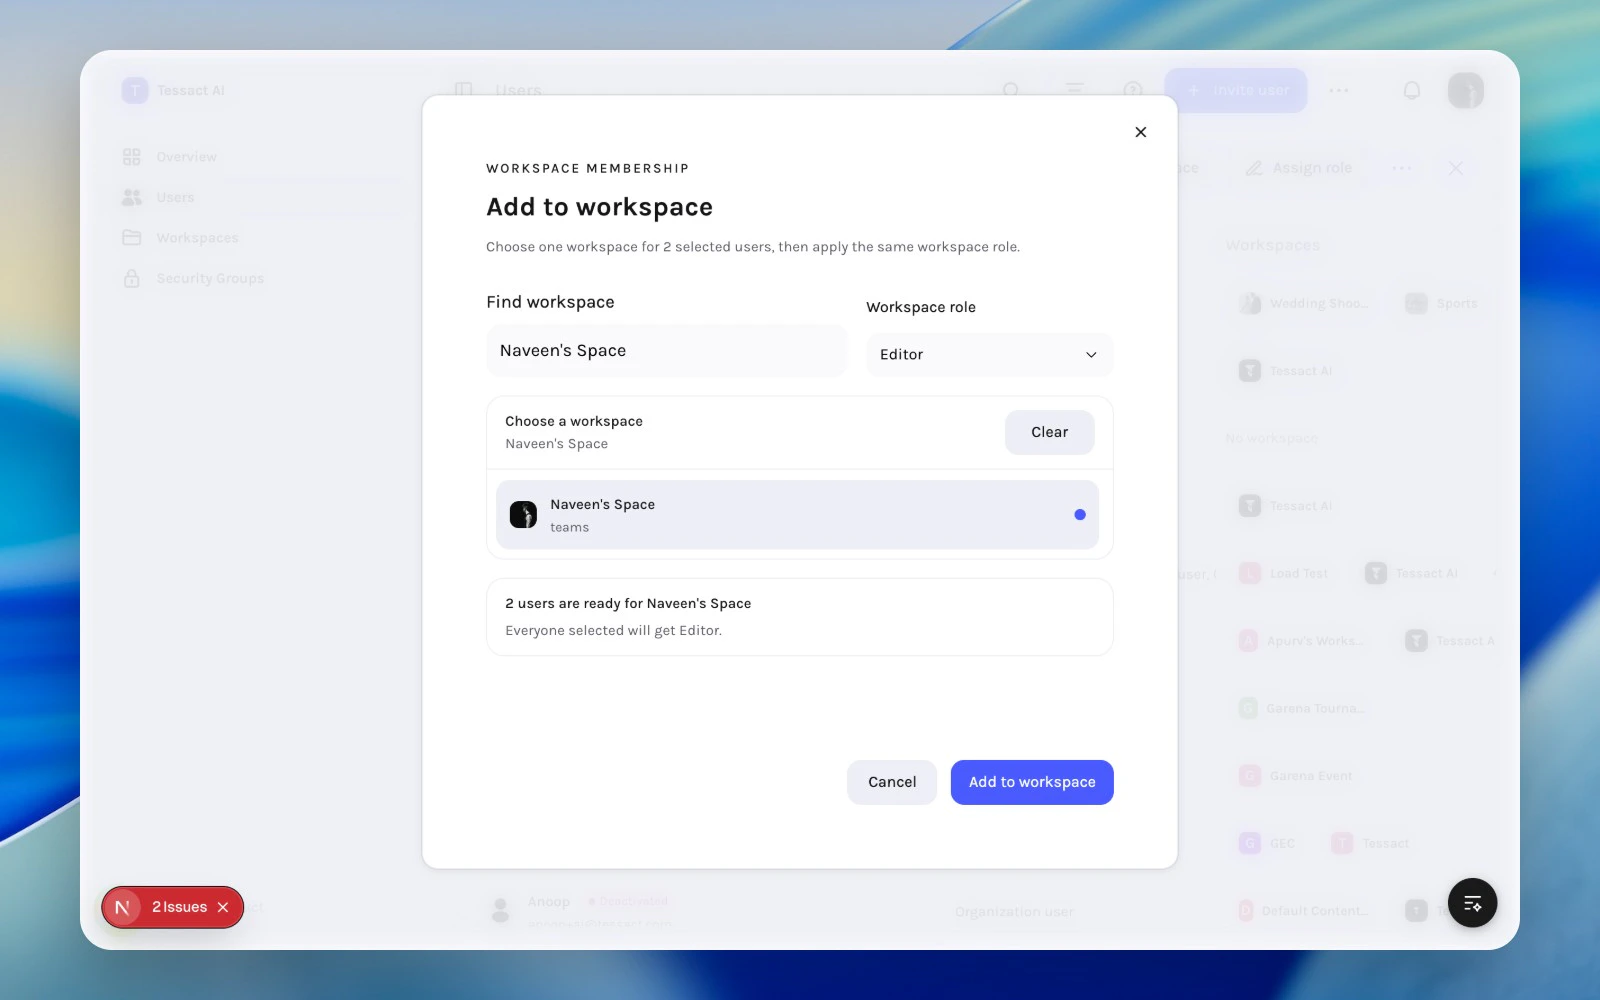
When several people need the same access, select them in the directory and use Add to workspace.The membership modal lets admins:
choose the destination workspace
choose the workspace role
apply the change only to eligible users
This is more efficient than opening each workspace individually when onboarding a team or correcting access for a cohort.
1
Filter or search until the right cohort is visible
Start from Users, then narrow the list by status, activity, workspace, or role until the people you want to update are easy to verify.
2
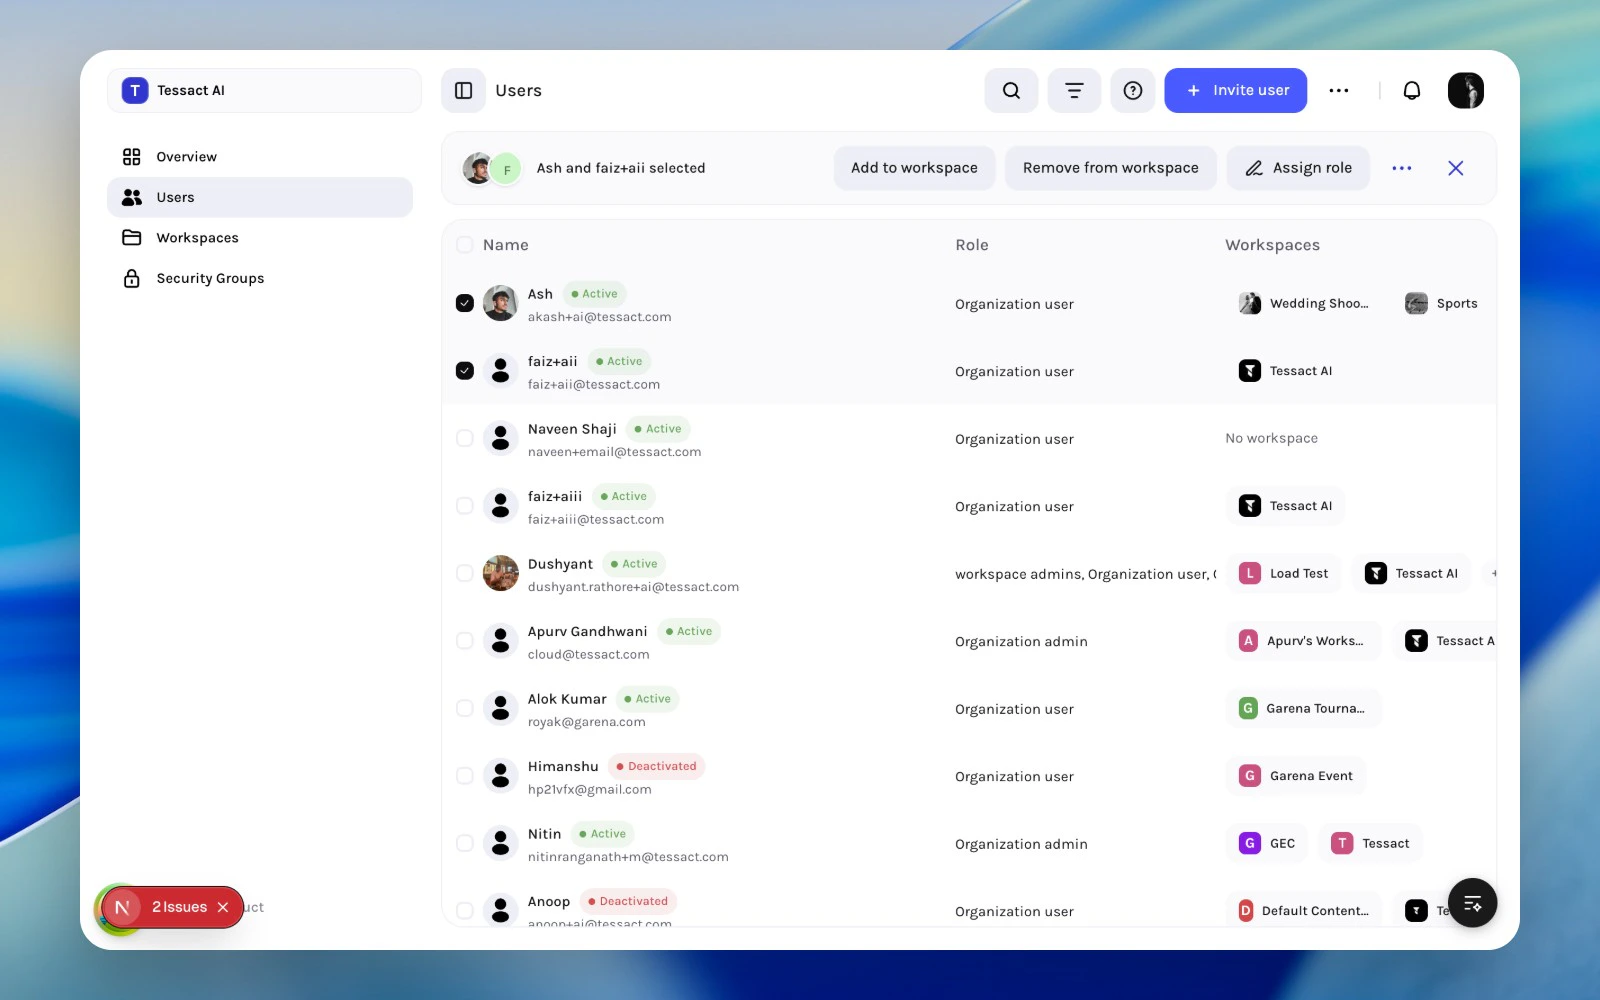
Select the users and open bulk membership actions
Use the left-side row selectors to choose the cohort. Tessact surfaces the selected-user action bar above the table as soon as you make the first selection.
Bulk selection state in the users directory
3
Choose the workspace and workspace role
Click Add to workspace, search for the destination workspace, then assign the shared workspace role that should apply to the eligible users.
Workspace membership modal with workspace and role selected
4
Review the impact before applying
The modal shows how many selected users are eligible for the change and how many will be skipped because they are already in the correct state. Use that preview to catch accidental over-selection before you submit.
Use Remove from workspace when a user’s organization account should stay active but their access to a specific workspace should not.This is the right action for:
team changes
project handoffs
temporary external access that has ended
workspace cleanup after an initiative closes
Removing workspace membership is more precise than deactivating the account.Use the same selection flow for Remove from workspace:
Select the cohort in Users.
Open Remove from workspace.
Choose the workspace that should no longer be available.
Apply the removal without changing the organization account itself.