Trigger downstream automation in Zapier whenever Tessact events fire through outbound webhooks.
Connect Tessact to Zapier so your Library activity can launch automations across more than 6,000 apps. The 13 October 2025 release introduced outbound webhooks, letting you push structured payloads into Zapier every time Tessact detects a key event in your workspace.
Zapier uses Tessact’s Trigger webhook action. Once you save an action in Settings → Actions, any matching event sends a POST request to the Zap webhook URL you supply.
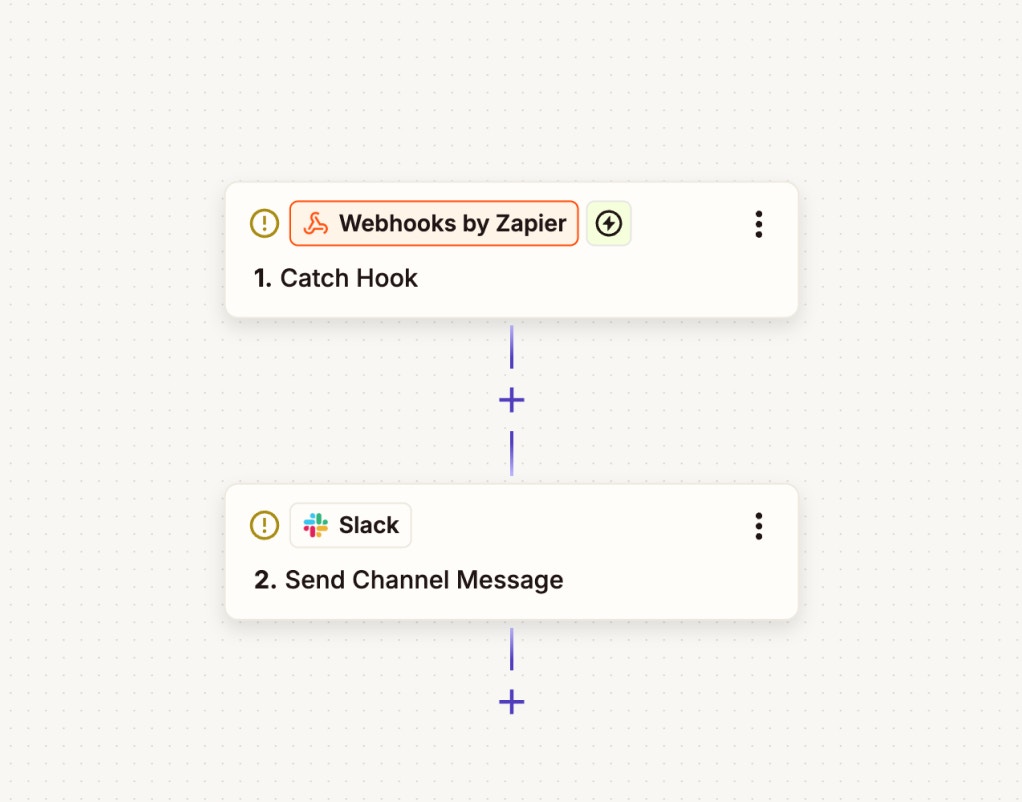
In Zapier, create a new Zap and choose Webhooks by Zapier → Catch Hook as the trigger. Copy the unique webhook URL that Zapier provides.
Zapier Catch Hook trigger configuration
2
Open Settings → Actions in Tessact
Navigate to Settings → Actions and select Create New Action to add an automation.
3
Choose an event trigger
Pick the Tessact event you want to monitor—for example File status change or File uploaded to folder.
4
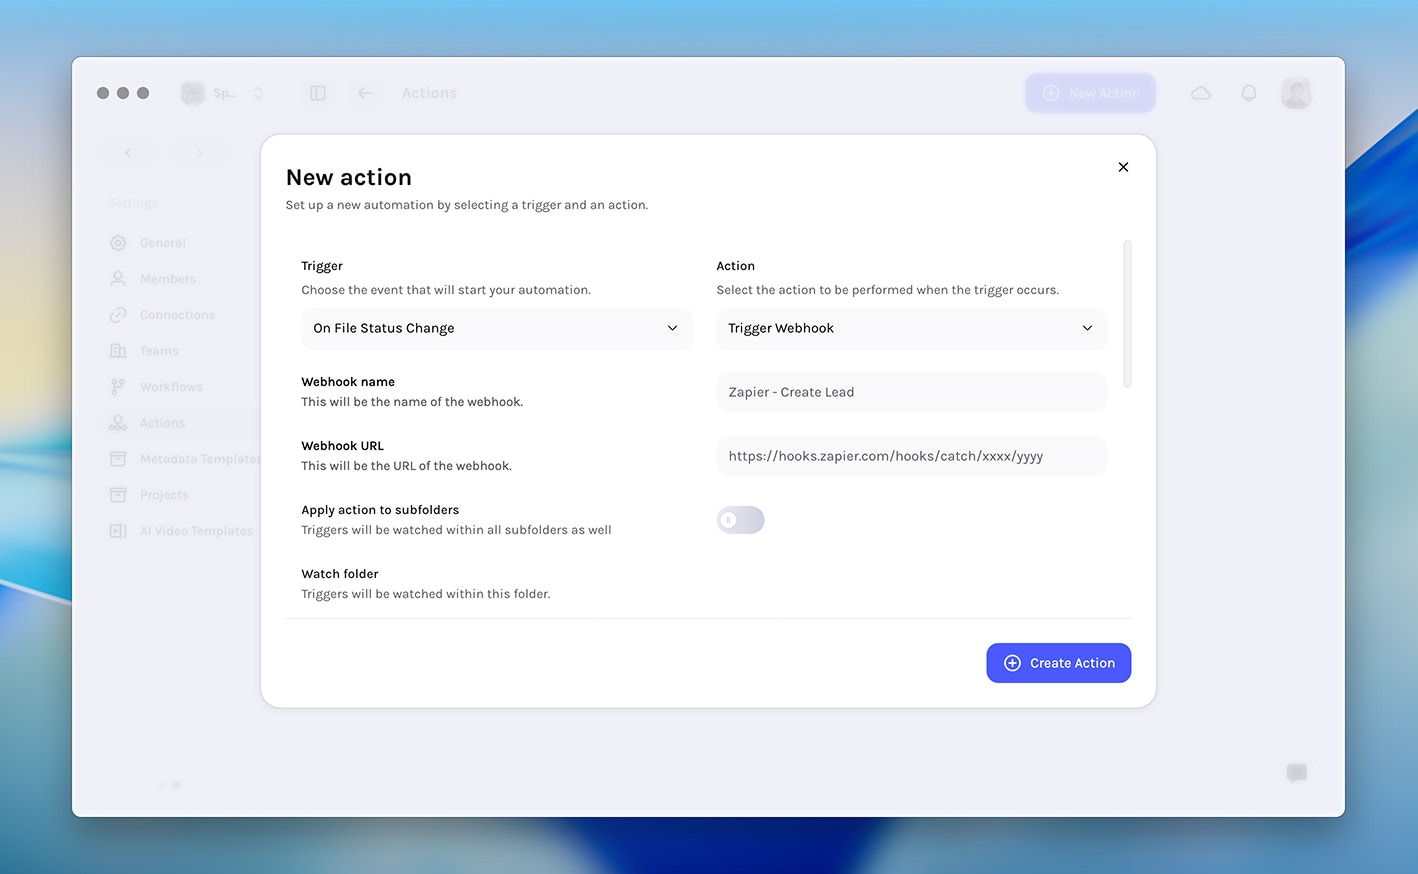
Select Trigger webhook and enter details
Set Action type to Trigger webhook, give the action a name, paste the Zapier webhook URL, choose an optional watch folder scope, and define the JSON payload you want Tessact to send. Save the action to activate it.
Trigger webhook action in Tessact
Only assets or folders affected after the webhook action is created will emit events. Historical actions are not replayed.
Your payload template can contain static values, Tessact variables, or structured JSON. Zapier automatically parses JSON bodies, so you can use nested structures for richer context.
In Zapier, click Test Trigger on your Catch Hook step. Perform the corresponding action in Tessact (for example upload a file). Zapier should instantly show the payload.
2
Map fields to actions
Add the downstream app step (e.g., Slack, Gmail, Airtable) and map each field from the Tessact payload to the inputs you want to automate.
3
Add filters or paths (optional)
Insert Zapier Filters or Paths to branch on status values, specific folders, or user emails before running the action.
4
Publish the Zap
Turn the Zap on. Tessact will now POST to Zapier whenever the trigger condition is met.
No payload in Zapier: Ensure the action is enabled and the Tessact event actually happened after it was saved. Use the test button to emit sample data.
Unexpected payload fields: Review your JSON template—invalid syntax causes Tessact to send a plain string instead of JSON. Validate with an online linter first.
Multiple notifications: Use Zapier filters or split actions per folder if the trigger is too broad.
Permission errors: Confirm your Tessact role can access the chosen watch folder and perform the action you are testing.