

1
Set the opening frame
Click the opening video clip in the timeline. Drag its left trim edge inward until the first visible frame has settled camera motion. Use the frame-step controls to inspect the exact boundary.
2
Add a title
Choose the Text tool from the right rail, click the canvas to insert a text layer, and enter a concise title. In the inspector, set a clear type hierarchy, then position it inside the title-safe region.
3
Give the title a readable base
Add a Solid layer, size it as a compact lower band, and place it behind the text with the layer-order controls. Lower its opacity until the landscape remains visible.
4
Time the overlay
In the timeline, move the text and solid so they begin after the opening shot settles. Trim both to the same end frame. Multi-select them when moving the pair so their relative timing stays intact.
5
Balance the opening audio
Select the opening video or audio layer and adjust volume in its inspector. Then drag the timeline’s fade-in handle to avoid an abrupt first sample.
6
Preview the result
Seek just before the title begins and play through its exit. Check at normal speed, then frame-step across the two boundaries to catch a one-frame flash or audio discontinuity.
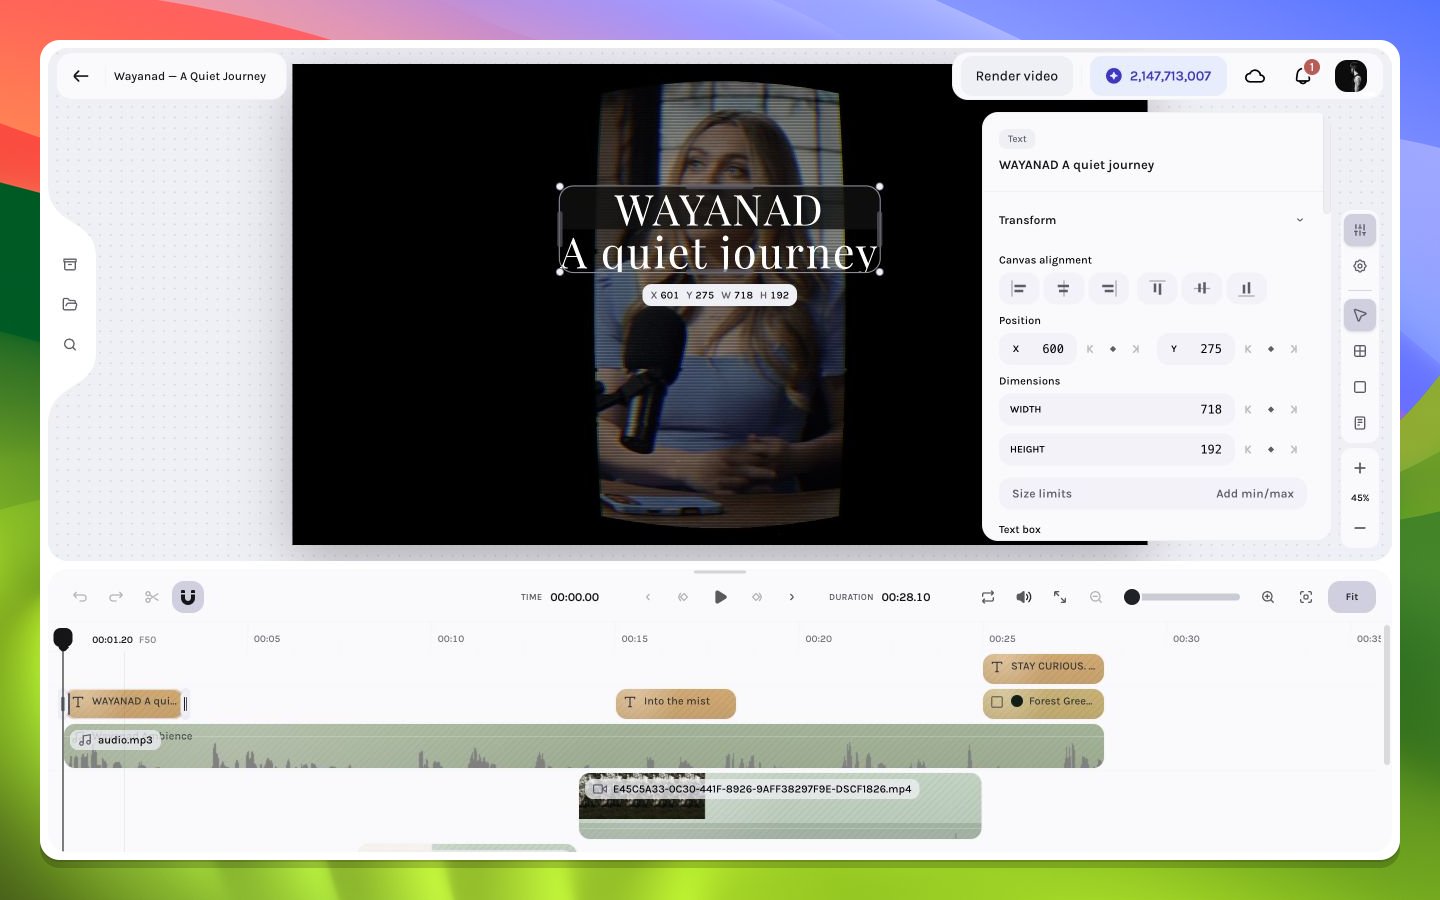
A title treatment selected in the inspector
Quality checklist
- The first shot begins on an intentional frame, not mid-jolt.
- Text remains legible over both the brightest and darkest underlying pixels.
- The solid and title share the same active interval.
- The title does not touch composition edges at any point in its animation.
- Audio enters smoothly and never clips.
- Playback crosses each edit without a blank frame.